I drink a lot of water, and I’m picky about how my water tastes. The Express Water whole house filtration system makes a huge difference in not just the taste of the water in my house but also in everything from laundry to washing my hair.
The water in my town is hard and filled with minerals and all sorts of impurities based on the reports we get each year from my town. I can tell based on everything from the nasty scale that builds up in my shower to the way my appliances wear down so quickly.
I am an affiliate with Express Water, and I may earn a commission if you purchase through an affiliate link. All opinions are my own honest experience.
Needless to say, this is part of why I was so excited to get an Express Water Whole House filtration system in the first place. I wrote an Express Water review about my experience with it several months ago, and it’s continued to work seamlessly since then.
The filters have been working hard to provide me with water that tastes good, that I can use to brew coffee instead of buying gallons of filtered water, and that doesn’t mean I have to heavy-duty clean my shower each month. When it was time to change the filters, I was a little intimidated, but it was far easier than I expected.
The initial installation definitely requires you to hire a professional plumber, but you can absolutely change your Express Water Whole House filters yourself. Depending on your water needs, you can choose the best fit of the whole home filtration to start drinking healthier water that filters out those impurities you otherwise find.
If you haven’t invested in a whole-home filtration system yet, I cannot recommend this enough. The difference I notice in my water’s taste and how it performs with everything from washing clothes to taking showers is impressive.
I know I’m saving money in the long run by not having to buy water elsewhere and by extending the life of my appliances. I’ve already had to replace the dishwasher and washing machine in my house, and I don’t want to have to do that again anytime soon.
If you have water issues, this whole house filter is affordable and really works. My water now runs clear. It feels different to the touch, and most importantly, it tastes good!
What are my filter options?
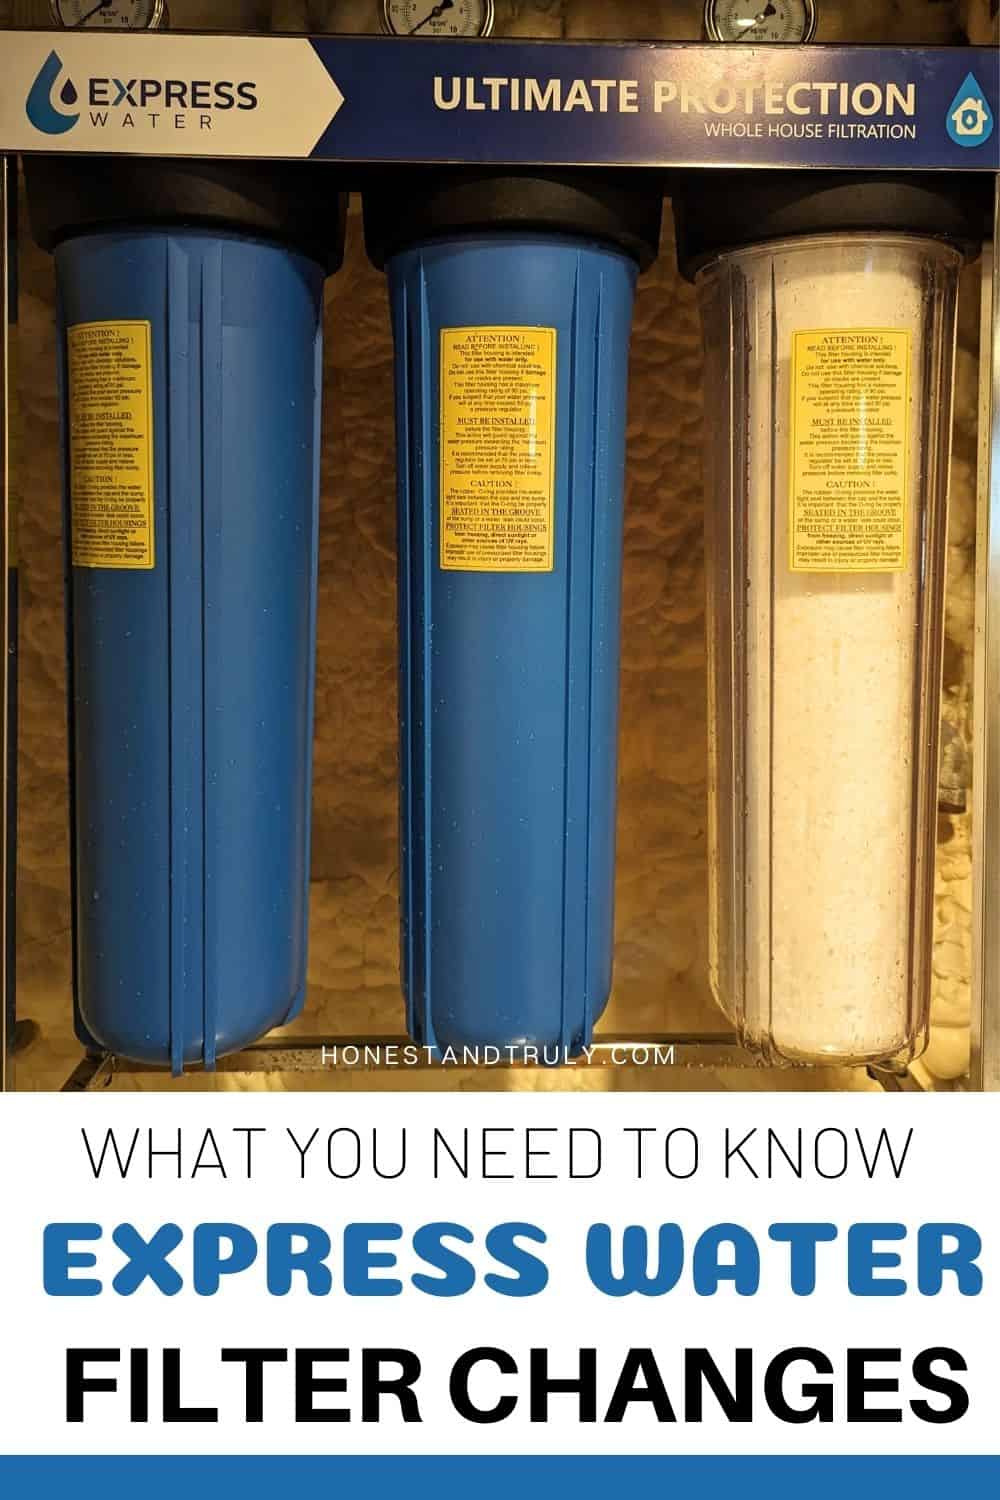
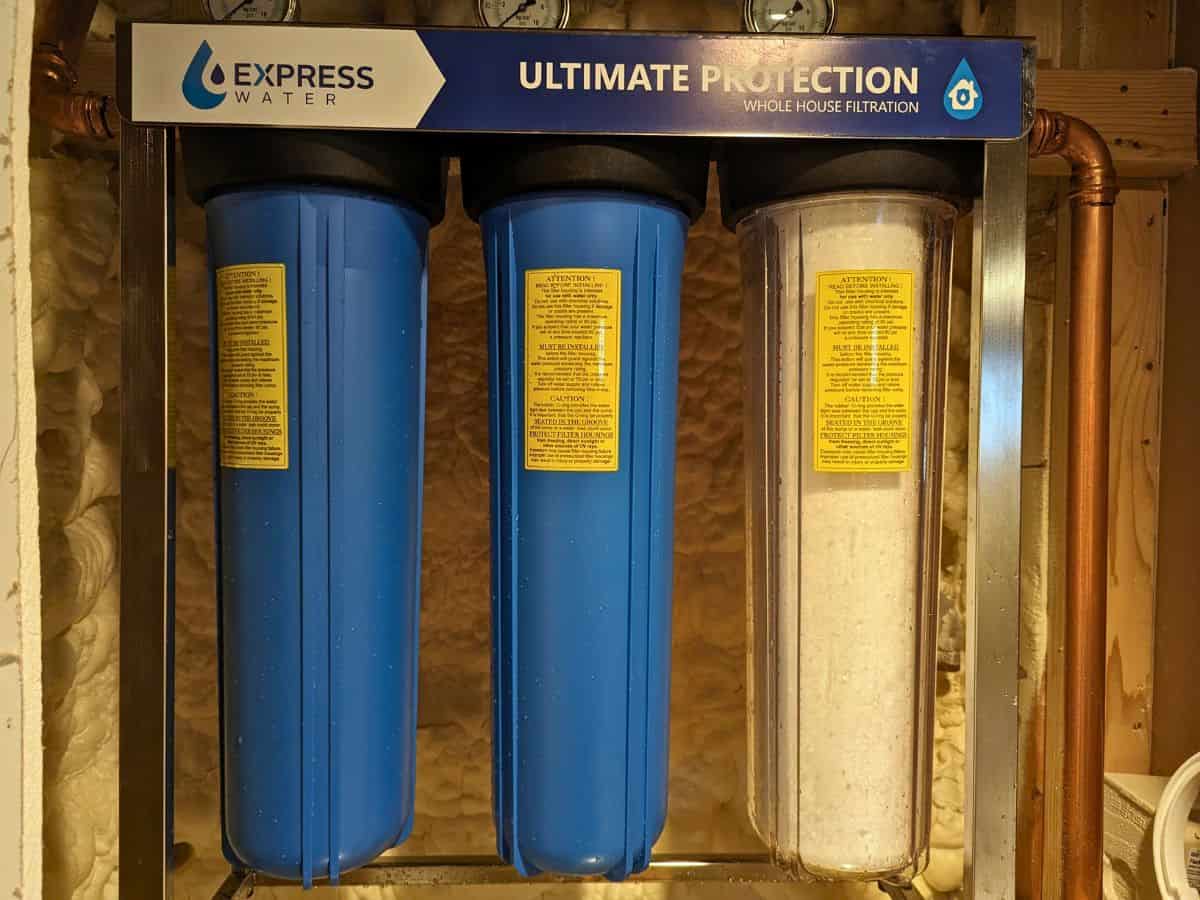
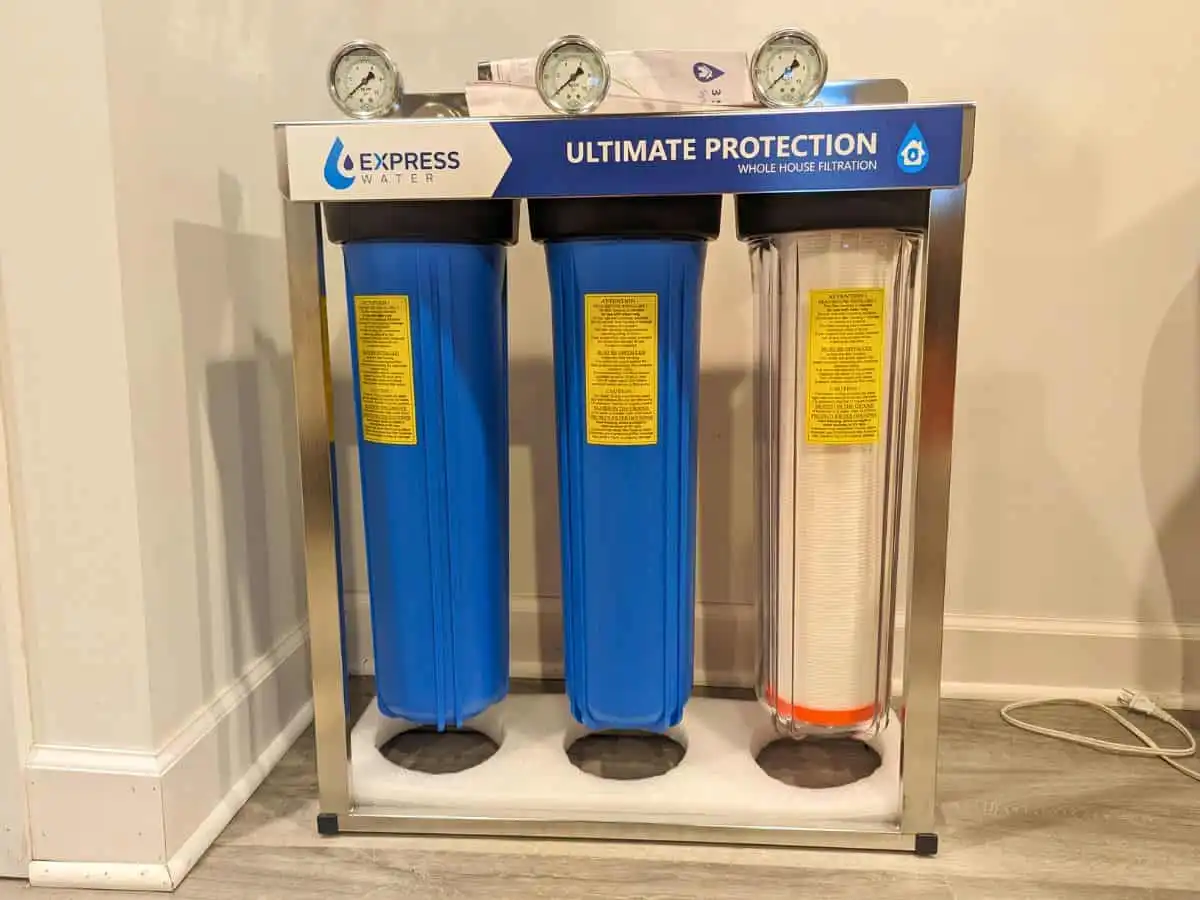
Express Water has three filters as part of their whole house filtration system, and when you change one filter, you should change all of them. Depending on your water needs, there are four filter options.
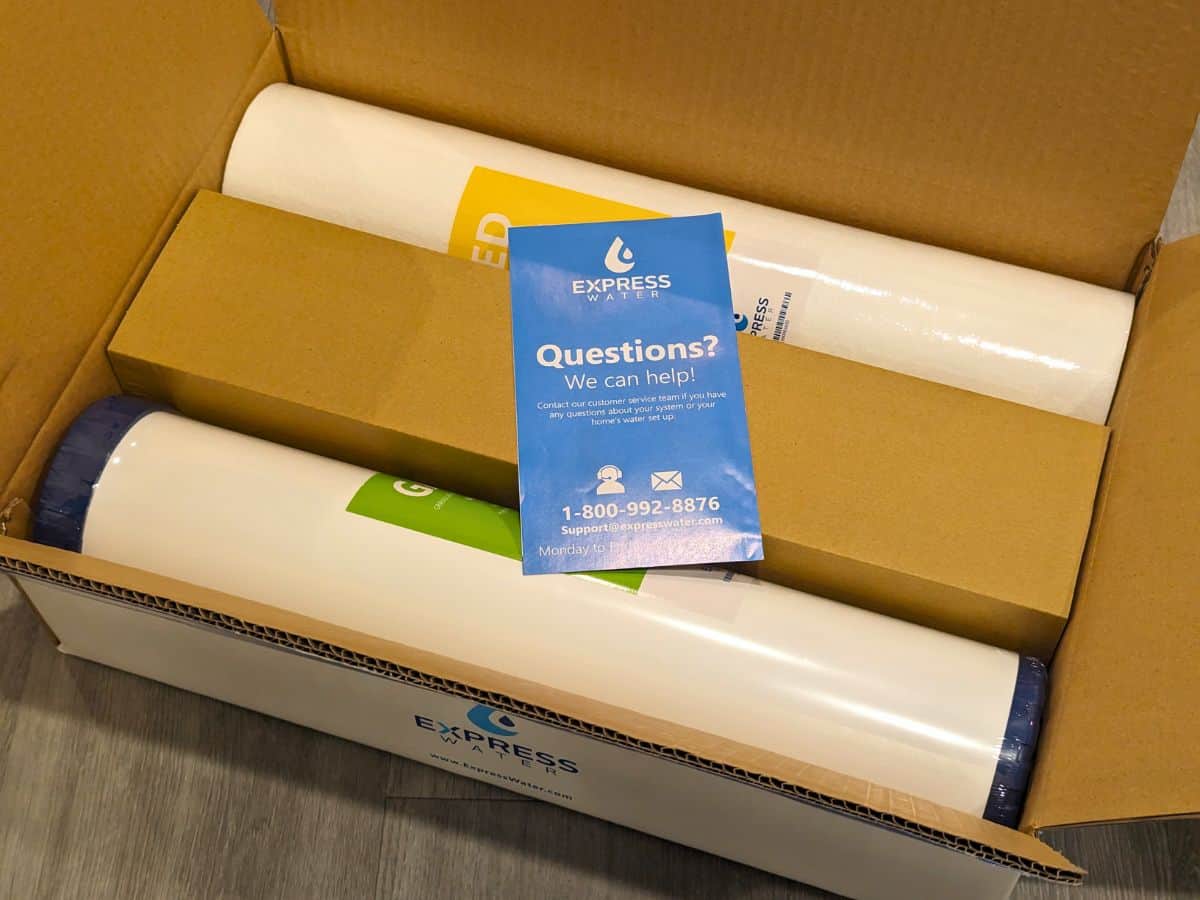
The standard filter set includes the sediment filter, the granular activated carbon filter, and the activated carbon block filter. The three work in concert with each other to provide you with the cleanest water possible and no loss of water pressure.
The sediment filter removes rust, dirt, silt, sand, and other sediments. The granular activated carbon filter removes radon, benzene, hydrogen sulfide, and other organic chemicals, and the activated carbon block removes chlorine, pesticides, unnatural tastes, odors, and other organic chemicals.
The anti-scale filter set includes the same sediment and activated carbon block filters, as well as a phosphate filter that prevents the development of scale and corrosion as well as removing sediment. This is great for ensuring you don’t have scale buildup with your appliances or rust buildup with your plants.
The heavy metals filter set also includes the sediment and activated carbon block filters, with kinetic degradation fluxion for the third filter. This filter removes heavy metals, algae, microorganisms, iron, lead, and chlorine.
Your final option is my original system, the ultimate protection filter set. This set contains the polyphosphate, kinetic degradation fluxion, and activated carbon block filters, which is great for all the impurities we have in my water.
The filter sets are all the same size, the 4.5 inch by 20 inch filters fit any of the Express Water whole house filtration systems. If your needs change over time, you can select the filter that is right for you then.
How often do I need to change my filter?
Express Water recommends changing your filters every six to 12 months, depending on your water quality and how much water you use. The first time you install your whole house filter, you are likely to need to change them out slightly sooner than you will later.
In general, the filters will last for approximately 100,000 gallons of water running through the system. Again, that will vary based on the water quality coming into your house.

How do I know when it’s time to change my whole house water filter?
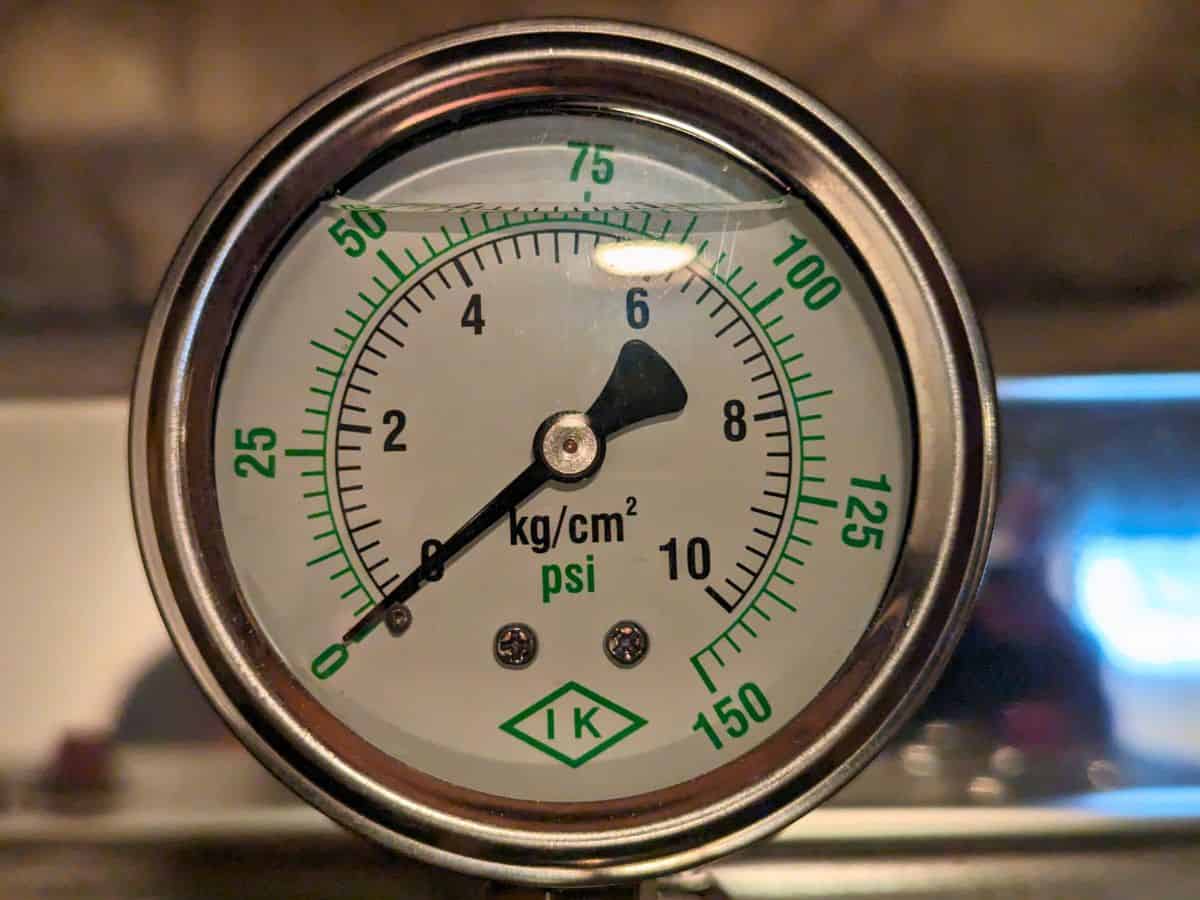
The great thing about the Express Water whole house filtration system is that it doesn’t reduce your water pressure. It filters up to 0.25 gallons per second to ensure you still have the pressure you need on a daily basis.
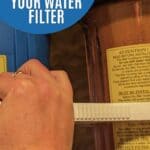
When you notice that your water pressure is starting to decrease, that’s when it’s time to change. The pressure gauge at the top of your filters tells you the pressure, so you can easily compare it to the pressure when you first installed your filters.
The pressure when my plumber first installed my system was about 72psi. When it got down to about 65psi, that’s when I knew the filters had absorbed so much sediment and ick that it was time to change them out.

What do I need to change the filter?
The good news is that you don’t need fancy tools or expertise to change out the filters. The most important piece is the giant plastic wrench that came with your initial system.
Aside from that, gather towels you don’t mind getting dirty, a five-gallon bucket, and silicone lubricant. Obviously, you also need your new filters.
Even though you turn off your water supply, you will have water spill and splash as you remove the old filters no matter how careful you are. It’s easier to have the towels spread on the ground around your system to catch the water before it falls than to mop your entire floor later when you’ve tracked it everywhere.
The five-gallon bucket is the easiest place to empty the water in your filter housing and to use to carry your old filters to the trash. You will not fill the entire five-gallon bucket with water from a single filter, but the size helps contain the water effectively.
The silicone lubricant is for your O-rings and something you can easily find at any hardware store. The silicone helps keep the O-ring in good shape and prevents its degradation as well as ensuring that you have a strong seal that also lets you loosen your filter housings.
How long does it take to change the filter?
Changing up your filters doesn’t take that long, but give yourself an hour just to be safe. This gives you time to empty your water pressure, change the filters, flush your system, and clean up any mess you may have made.
Once you turn off the water, you need to turn on the closest faucet to depressurize your plumbing or you will never be able to remove the filter housings. It took nearly ten minutes before the water finally stopped running for me.
The actual process to change out the filters took less than ten minutes. Flushing the system takes the longest, as you need to run the water until it is clear, then run it an additional five minutes.
You need to run it again for another ten minutes a half hour later, and I use that in between time to ensure I have any water mopped up with towels and clean up any other mess I may have made.
How do I change my Express Water whole house filters?
Depressurize your plumbing
The first step is to locate and turn off the water supply to your house. Ensure you have the valve completely closed, then turn on the closest faucet and let it run until the water stops.
While the water runs, place your towels under and around your filtration system. Set the five-gallon bucket under the first filter housing.
Turn off that faucet, then press the red depressurization button at the top of your whole house system.
Remove the filter
Use the large plastic wrench to loosen the first filter housing, remembering lefty loosey righty tighty. Turn it clockwise – to the left – to loosen it, and have the wrench as high up on the filter housing as you comfortably can.
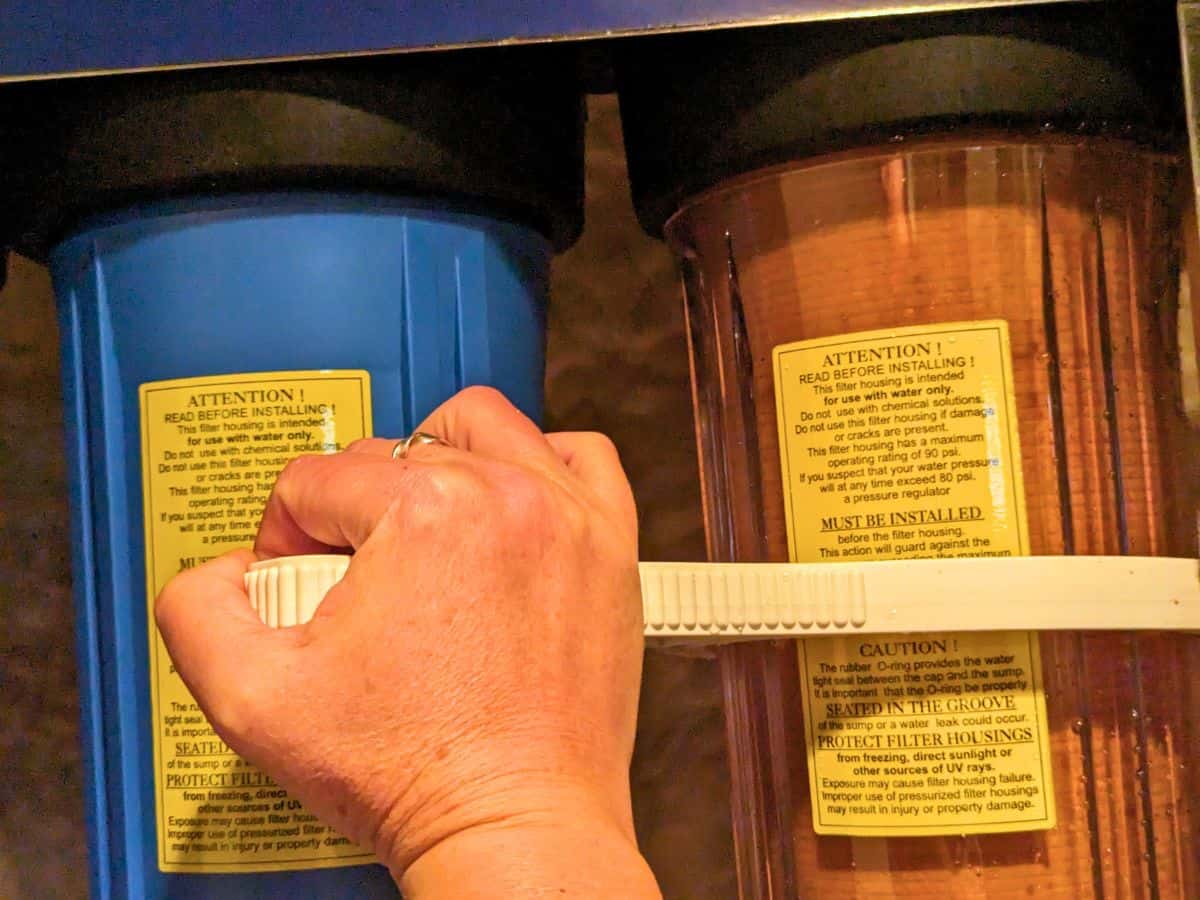
After you do the first quarter turn, you can manually loosen it the rest of the way. If you struggle to loosen the housing, check the water pressure again to ensure you released it fully. I also had one housing that was a bit harder to loosen manually where I used the wrench a couple extra times to turn it, but that was the exception.
As you loosen the housing, expect that you will have some water overflow, which is why you want the bucket under to catch as much of this as possible. When it comes loose entirely, you are unlikely to hold it completely straight as the weight releases into your supporting hands, so it may splash again a bit.

Place the housing into the bucket and carefully move it to an open space or have a second bucket ready. Lift the housing and pour the water into the bucket, and let the filter itself fall into the bucket, as well.
Check the housing filter. If it appears dirty, be sure to clean it. If it is just a little sediment, you can try to rinse it out. If it’s more dirty, you will want to clean it more thoroughly with a premixed solution of a gallon of warm water combined with one tablespoon of bleach.
Use rubber gloves to protect your hands and a sponge to scrub the inside and top of the housing. You should plan to do this once a year, and be sure to rinse it thoroughly until you cannot smell any remaining bleach.
Replace the new filter
Place your new filter into the housing, and verify that you have the correct filter for the correct housing and that you have it right side up with the O-ring at the top. Check your O-ring and lubricate it as needed.

Place the filter housing back under the manifold of your whole house system. Support it from the bottom and begin to turn it counterclockwise – to the right – until it is well-threaded. Manually turn it until it is relatively tight, then use the large plastic wrench to tighten it just a bit more.
Be sure to not overtighten the housing, as it can crack if you do it too much. It will also become more difficult to remove it when you need to replace it next time, so know that the water pressure helps to create a stronger seal than you expect.
Turn your water back on
Once you have all your filters swapped out and tightened, turn the water valve back on. Be sure to watch your whole house system as the water runs into it to be sure you have no leaks.
If you have any leaks, turn the water off again. Check the housings to make sure they are correctly threaded, that the O-rings are in place where they belong, and that it is tight enough before you try again.
I had zero issues and no leaks, which was my biggest concern before I started to replace my filters. I barely tightened the housings with the wrench, so you truly do not need to overtighten these.
Once you have no leaks and you verified that the pressure gauges are where you expect them to be, turn the cold water faucet closest to your filtration system on again. This flushes the new filters, and the water will initially look brackish or have bubbles.
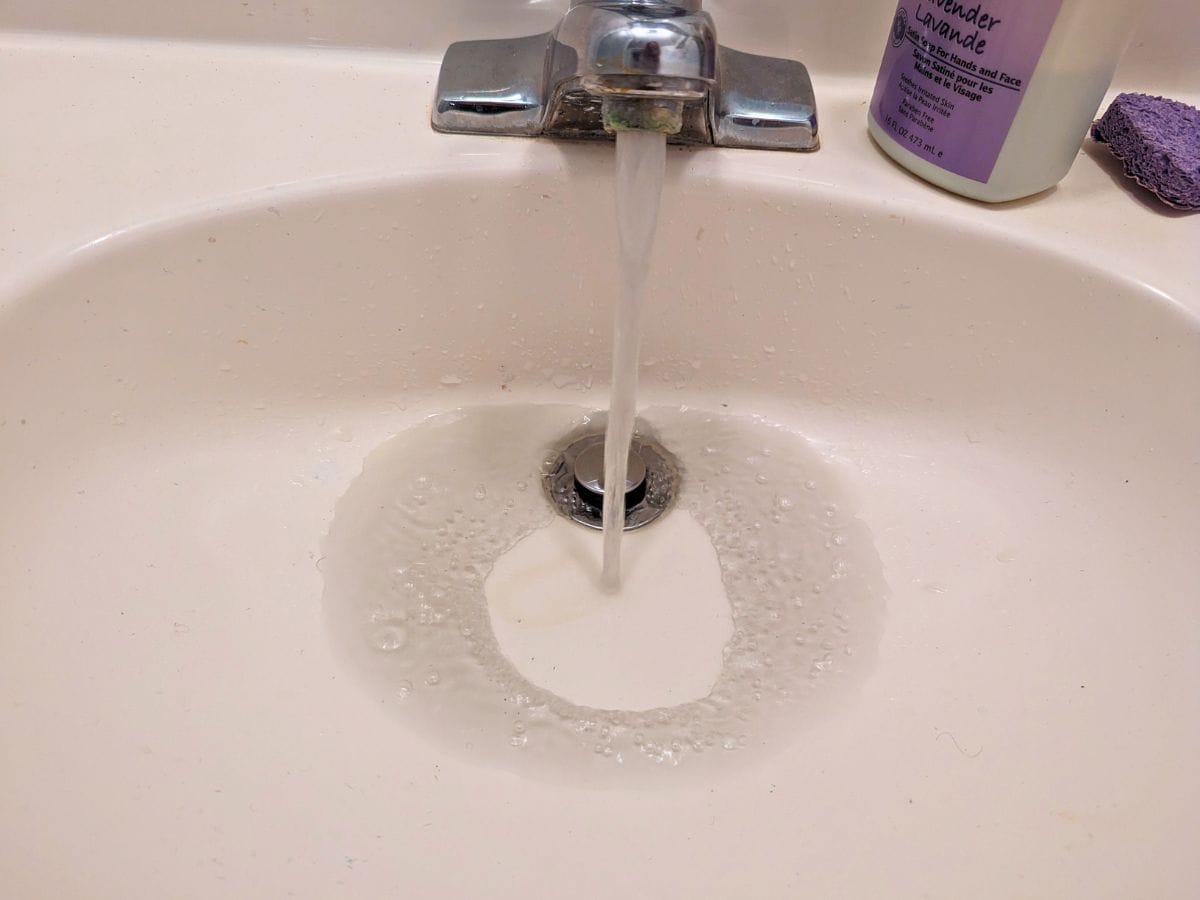
This is totally normal, and it will quickly run clear again. Let the water run for another five minutes after it first runs clear, then turn it off and wait for 30 minutes.
While you wait, clean up your work area. Use the towels to mop up any water spills, throw away your garbage, and the like.
After 30 minutes, you need to run your cold water again at that same faucet for another 10 minutes. After that, you’re all set until it’s time to change your filters again.
Final Thoughts
Changing out the filter was far easier than I thought it would be, and my water is back to the high-pressure clean water I have enjoyed for the past several months with my Express Water whole house filtration system.
This is something you can do on your own, but it is definitely easier with a second person to help you. It is well worth the minimal overall cost to protect my appliances and increase their lifespan given the impact I can see already.