This post sharing my recipe for monster cake pops was originally a sponsored post. Some links in this article are affiliate links that may earn me a commission if you purchase through them.
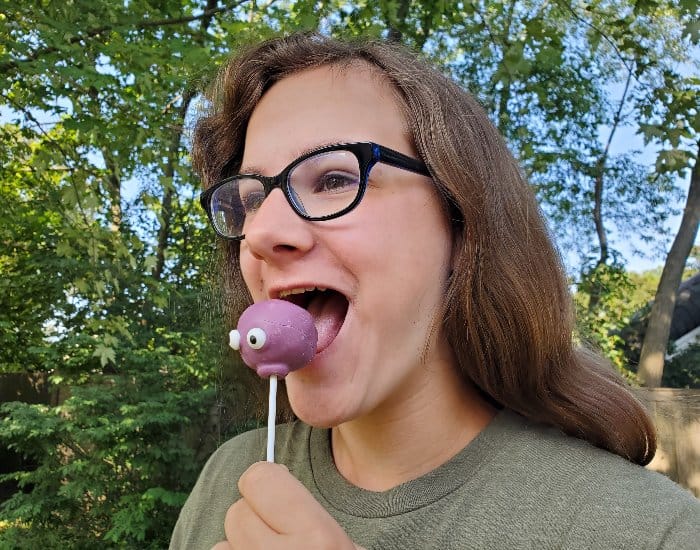
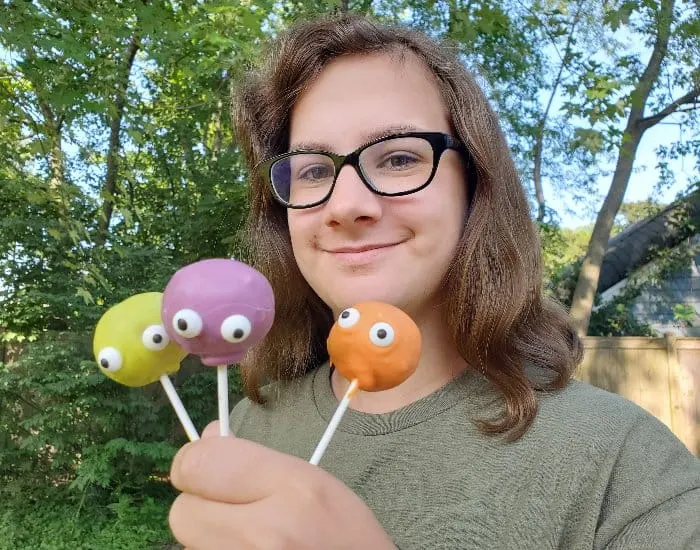
These monster cake pops are a fun and easy Halloween dessert, and they are perfect for any Halloween party, whether it’s a school class party or a fun adult Halloween party.

I don’t care how old or young you are, Halloween holds a special place in my heart, and I bet it does in yours, too. It’s no surprise that Halloween sales grow every year, right?
While this year might look a little different, we plan to celebrate and already have some spooky happenings up our sleeve.

These Halloween monster cake pops are just some of my first creations of the year. We’ll decorate our full house, get the kids in costumes, and more.
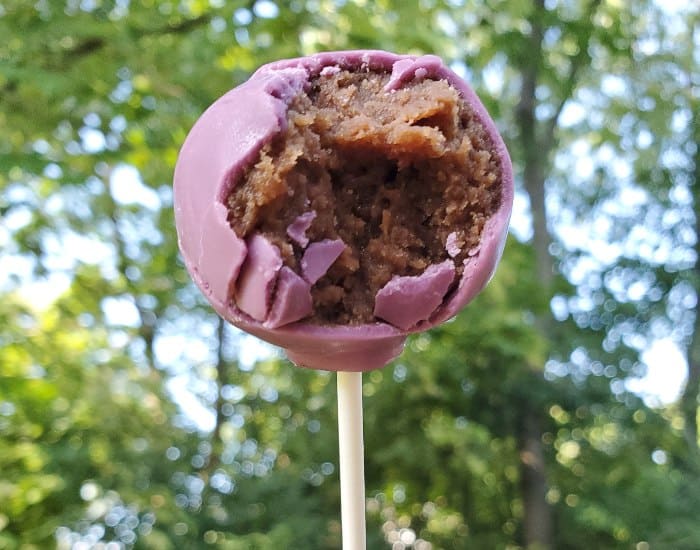
For these, I went with brownies inside because it seemed to go better with the Halloween theme than cake. And they taste amazing this way!

Bonus? I picked up some marshmallows and decided to make some gluten free treats, too. If you have anyone with allergies, consider making monster marshmallows instead.
There’s absolutely no baking involved at all, and you can whip them up last minute. However, if you are making these for anyone with food allergies, make sure you do your marshmallow dipping first before you do the brownies to avoid cross contamination!


Just follow the same steps you do for the monster cake pops in terms of the dipping, and you’re all set!

What kind of brownies should you use for cake pops?
I use my favorite brownie recipe for these cake pops. You don’t want a super dry brownie for these, so make sure they aren’t overbaked and are brownies you made within the last couple days so they’re fresh.
The cream cheese helps if they’re a little bit past their prime, but you don’t want dry and crumbly brownies.
You can absolutely use a box mix if you prefer or even buy brownies already made from the store. Just make sure you don’t get frosted ones.
I do not use brownies with any mix ins for these. Avoid the nuts, chocolate chips, and more, as you can’t easily make a smooth round ball with them.
What is the best way to melt chocolate?
For cake pops, we use candy melts, but the same strategy holds true as when you melt chocolate. They melt at a fairly low temperature, and it’s easy to burn them.
I use a heavy enamel cast iron pot on low heat to melt my candy melts, stirring regularly. The cast iron retains the heat so it doesn’t harden too fast while the low temperature ensures nothing burns.
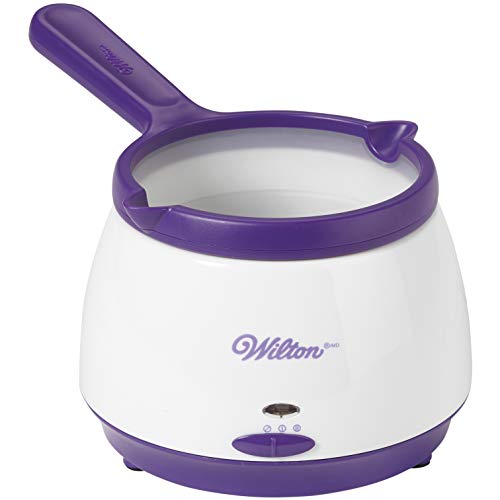
The easiest way is to use a chocolate melting pot that holds your chocolate at the ideal temperature. I inevitably have to gently reheat my melts as they start to cool and thicken, and this tool ensures the last monster cake pop looks as perfect as the first one.
Plus side, you can use this to make truffles or to enjoy chocolate fondue, so it becomes a multi-purpose tool you use regularly.
Alternatively, you can also use a double boiler to melt the chocolate or candy melts. Be sure the bowl doesn’t touch the water and that no water or steam gets into the bowl, or your chocolate will seize.
Can you make monster cake pops in advance?
Yes, you absolutely can make cake pops ahead of time. I usually make them a day or two in advance and keep them stored in the fridge in a tightly sealed container.
The chocolate seals in the freshness, which definitely helps. You can make them up to two weeks before your party, if needed.
They do need to be refrigerated, however, as they contain cream cheese. Food safety comes first!
Before you serve them, remove them from the fridge and open the container. Check them to ensure no condensation or moisture got onto them in the fridge, and you’re all set.
How to share the monster cake pops
These are also perfect gifts, as you can easily package them in single serving bags and tie them with pretty Halloween ribbon, if you choose.
Additionally, you can skip the stick and just use chocolate dipping tools to dip the chocolate ball to create the monsters and ship them. This would be a super fun addition to a Halloween themed care package – just freeze them first and maybe don’t ship to hot climates (and I have tons more care package ideas, too).
What You Need to Make Monster Cake Pops:

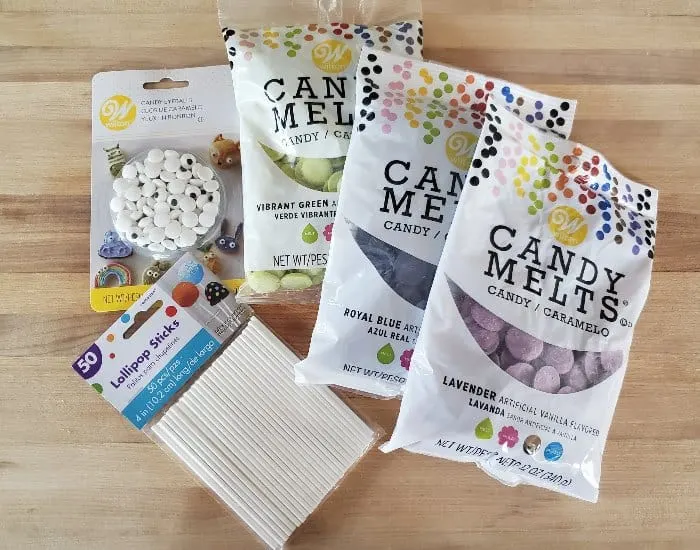
- Pan of cooked brownies
- Cream cheese
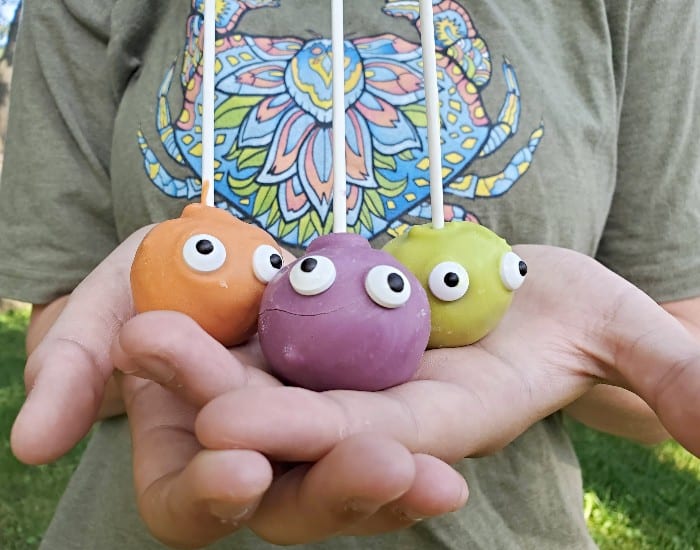
- Candy Melts in various colors
- Candy Eyeballs
- Lollipop sticks
- A box with holes
Monster Cake Pop Tips:
To make the brownie center:
- Adjust the amount of cream cheese you use based on how dry your brownies are when you crumble them. I used four ounces, and that was plenty. I could have probably used two or three ounces. You can always add more if you need it for your brownies to hold together, but you can’t easily take it out!
- Use a cookie scoop to make even size cake pops. It’s the easiest method that make the least mess, and you end up with uniform cake pops.
- Refrigerate or freeze your cake pops long enough. It’s tempting to want to go through all the steps right away, but the cooler your cake pops are, the easier they are to form into smooth circles and the easier to dip.
When dipping your cake pops:
- While I prefer to melt my candy melts over the stove on low heat so I can control how quickly they melt, you can use the microwave. Just make sure you do it in short bursts and stir each time you check it.
- Regardless of how you melt your outside shell, remove it from the heat before all the candy melts are melted. You want the residual heat to do the work to prevent anything from scorching.
- Make sure to dip your stick lightly in the candy melts before you put the stick into the brownie. That helps it stay in place as you dip the cake pop.
- You want the stick about halfway into the cake pop. Let the chocolate harden before you dip the brownie fully into the candy melts.
- Coat the brownie ball completely; you may need to use a spatula to help get the top covered. When you lift it out, twirl it lightly to remove the excess chocolate.
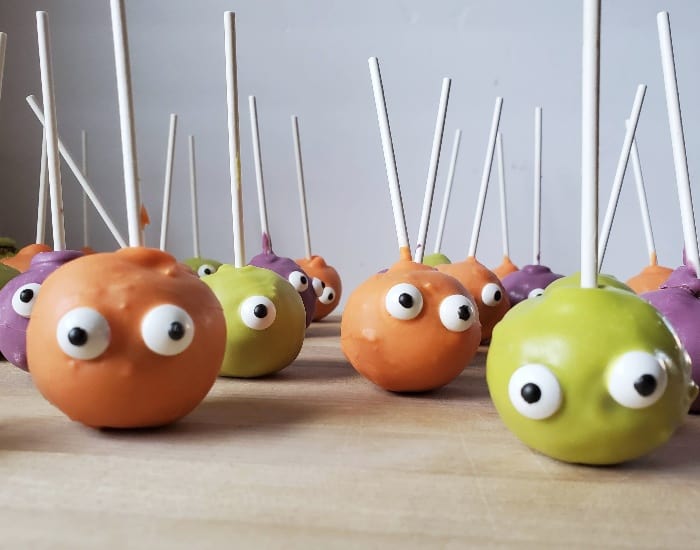
- Use an old box and poke small holes in it to hold your cake pops while they harden. This keeps them looking nice all the way around instead of flat on top. While you could use foam, why buy something you don’t need to?
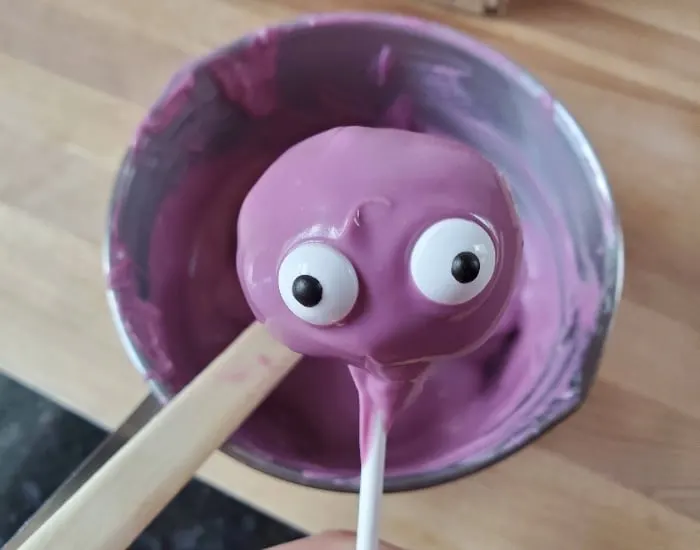
- Add the eyes as soon as you finish dipping the monster cake pops. I need to do it face up for perspective, but if you’re comfortable doing it when they’re drying in your holder, go for it.
How to Make Monster Cake Pops
Bake your favorite brownies. Feel free to use a box mix or my favorite brownie recipe.
Let the brownies cool completely, and yes, you can even do this a day or two ahead of time. Once they cool completely, remove the edges, as you want to use only the soft center for your monster cake pops.
Make sure you take your cream cheese out so that it has time to come to room temperature before you start to work on your brownie center.
I don’t even bother to remove my brownies from the cake pan first. I use my bench scraper to cut around the edges, then I grab one of my plastic scrapers to scoop out the center of the brownies. This protects my nonstick pan from scratching.
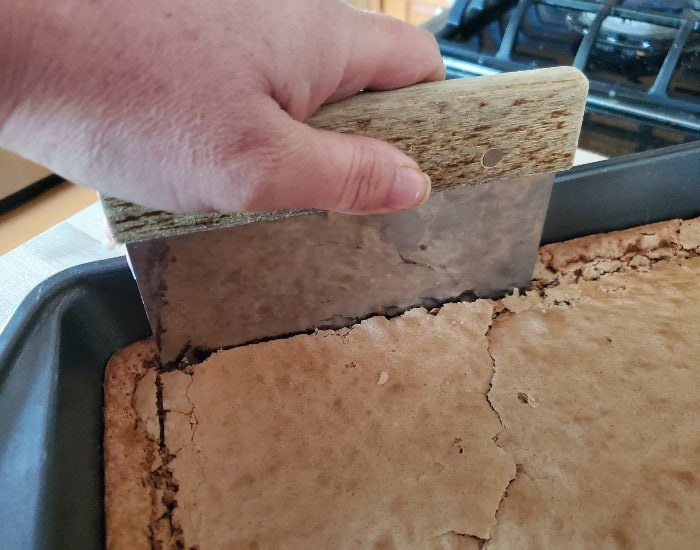
Discard the edges, which really means eat them yourself after you’re done with your cake pops.
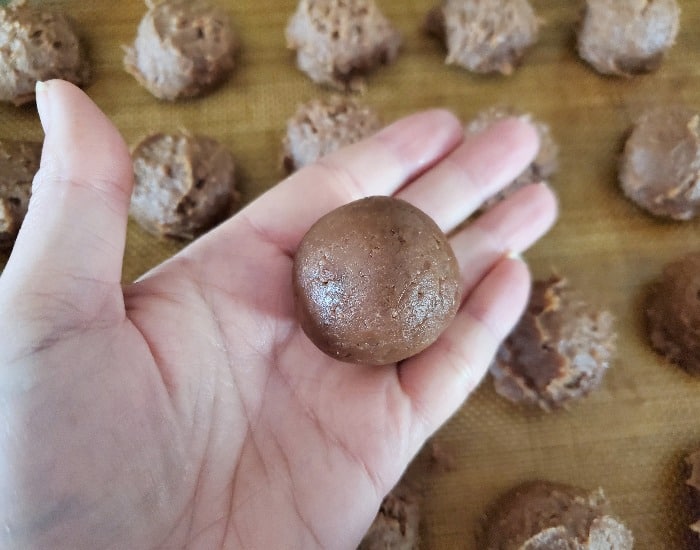
Place the brownies into a bowl and mix them up until they are completely crumbed. Add the cream cheese and beat until it’s thoroughly combined.
Use a cookie scoop to scoop out the brownie mixture and place it onto a silpat or parchment paper lined cookie sheet. You can place them close together, as they don’t change in size at all.
Place your cookie sheet into the freeze for at least a half hour or fridge for an hour or more. Once they’re chilled (but not frozen), quickly roll them into smooth balls.

You can stop here and freeze them until you need them later, if you run low on time.
Otherwise, gently melt a single color of candy melts until most are melted. Remove from the heat and stir until the last bits are smooth.
Dip your lollipop stick just a bit into the candy melts, then pop it into your brownie ball.


Once it hardens, dip the entire brownie ball into the candy melt and gently turn to ensure it’s fully coated.
Remove from the chocolate and lightly spin to remove any excess chocolate. Add eyes immediately.

Place the stick into a holder for the monster cake pop to harden.
Serve once hardened, or refrigerate up to two weeks.

Have you ever made your own monster cake pops?

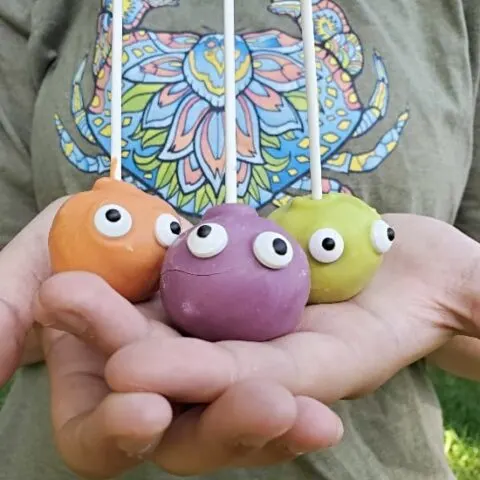
Monster Cake Pops
The adorable monster cake pops are super easy to make. They're fun to share and taste delicious with the chocolate-y brownie inside, too.
Ingredients
- 1 recipe baked brownies
- 4 ounces cream cheese
- 1 1/2 cups candy melts
- 54 candy eyes
Instructions
- Bake your favorite brownies. Cool thoroughly and cut off the edges.
- Soften cream cheese.
- Place brownies into a bowl and mix until they come together. Add cream cheese and beat until thoroughly combined.
- Scoop out brownie mixture and place it onto a silpat or parchment paper lined cookie sheet.
- Thoroughly chill, then roll into smooth balls.
- Melt candy melts carefully to avoid scorching.
- Dip lollipop stick just a bit into the candy melts, then place into brownie ball. Let harden.
- Dip entire brownie ball into the candy melt and coat fully. Remove from chocolate and let excess drip off. Add eyes immediately.
- Place the stick into a holder for the monster cake pop to harden.
- Serve once hardened, or refrigerate up to two weeks.
Notes
- Use multiple color candy melts to make a fun variety of monster cake pops. You will need to melt more chocolate than you will use, so know that you'll have extra.
- If the dipping starts to get harder, gently reheat your candy melts to ensure they are thin and pourable.
- For more tips, be sure to read the full article.
Recommended Products
As an Amazon Associate and member of other affiliate programs, I earn a commission from qualifying purchases.


Nutrition Information:
Yield: 27 Serving Size: 1Amount Per Serving: Calories: 120Total Fat: 2gSaturated Fat: 1gTrans Fat: 0gUnsaturated Fat: 1gCholesterol: 6mgSodium: 29mgCarbohydrates: 25gFiber: 0gSugar: 16gProtein: 0g
This site uses an outside source to provide nutrition as a courtesy. If you need exact values, please calculate yourself.


I am a participant in the Amazon Services LLC Associates Program, an affiliate advertising program designed to provide a means for sites to earn advertising fees by advertising and linking to Amazon.com.
Leave a comment