


This homemade dinner rolls recipe is all that I hoped it would be. Some links in this post are affiliate links that earn me a commission if you purchase through them.
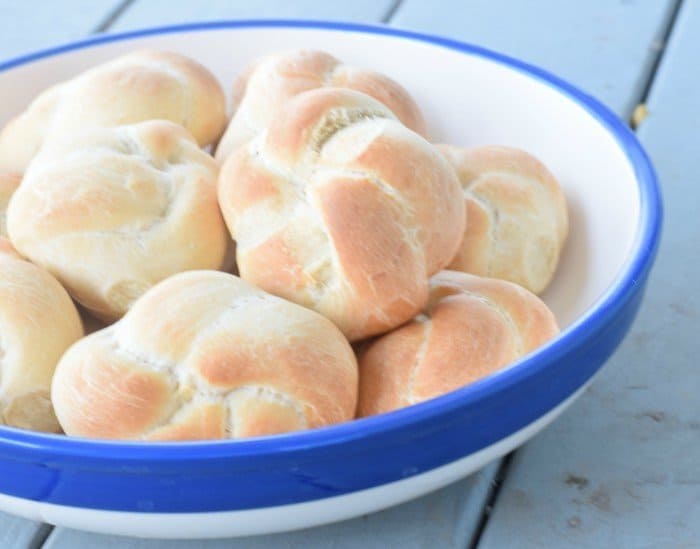
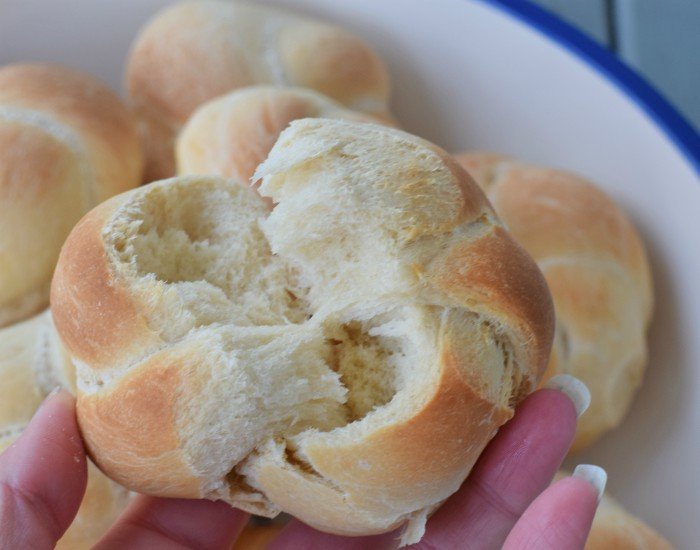
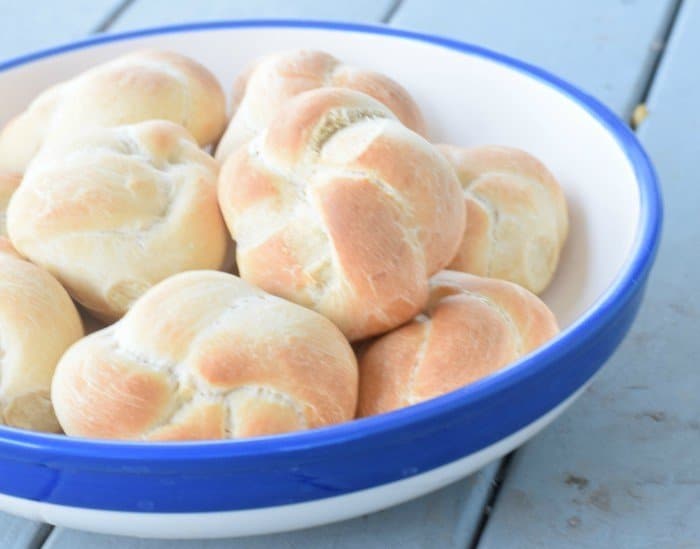
These rolls are soft and moist inside. It has a light buttery taste. It has substance to it, but it is so soft.
Best of all, it’s easy to make. You know this is the recipe I make now for all my family get togethers, on request of course!
I love a good dinner roll. Growing up, we always ate the ones that came from the plastic bag that were mostly baked.
Sometimes we’d get ambitious and cut frozen bread dough into pieces and put three in each hold of a muffin tin and have cloverleaf rolls.
They tasted good, but I always wanted good homemade dinner rolls. One where I knew the ingredients it contained. One I felt good about eating.
These homemade dinner rolls? Mission accomplished.
When they first came out of the oven, I set them on a rack to cool. Unfortunately, I could smell them from across the room as I sat back down to work.
I ended up walking over again and picking one up. I intended to just tear off a little piece to try it. Maybe half. That dinner roll disappeared. Oops.
When my family came home for dinner, I had some tomato basil soup ready for them to go with the homemade dinner rolls. They demolished the eleven dinner rolls remaining more quickly than I had expected.
So much for leftovers, but that’s also a pretty good testimonial. That and the fact that they’re already begging for more.
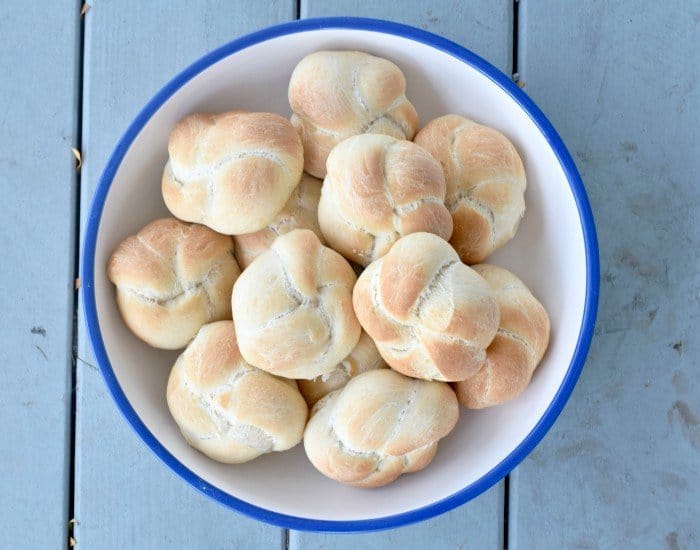
I chose to make my homemade dinner rolls into knots because they’re pretty and fun that way. They’re also surprisingly easy to shape into knots, but shhh no one needs to know!
You could very easily simply cut them into pieces and gently roll into a ball, tucking the ends underneath for a more traditional looking roll. Whatever you do, lose any fear you have of making homemade dinner rolls, and try these!
How to Make Homemade Dinner Rolls
It’s easiest to make this in a stand mixer, but you can make it by hand – these fancy gadgets didn’t always exist.
Add your warm water to the bowl of your mixer and the yeast over it. Sprinkle in the sugar. In a separate bowl (I always use a large liquid measuring cup – I have to measure anyway, why dirty another bowl?), whisk together the warm milk, egg, oil, and salt. Pour into the water and yeast and stir.
Add the flour, a cup at a time, and mix until it’s formed a dough. It will look ragged, but keep kneading on low speed for 8-10 minutes, and it will come together nicely.
When you can feel it spring back, you’ve kneaded it enough. It will still be slightly sticky, but that’s normal. Don’t add more flour.
Cover your bowl with a damp towel to hold in the moisture, and set it in a warm place to rise for an hour. Once it doubles in size, you’re set.
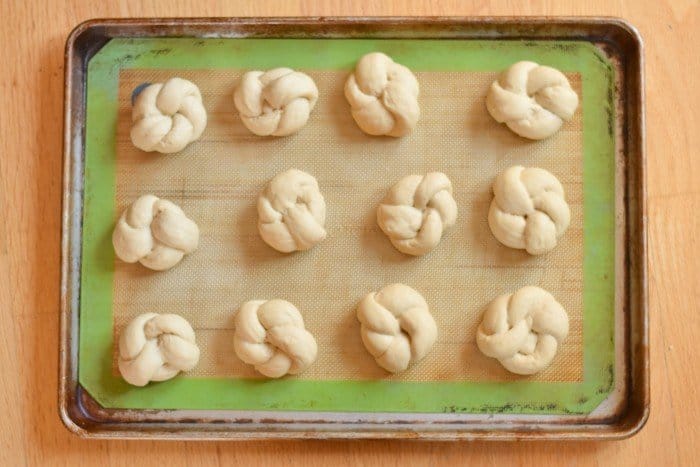
Each roll will be about 2.4 ounces if you weigh your dough. This makes 12 rolls, and I prefer weighing them than trying to divide the dough into twelve equal size pieces.
Shape as described below to make knots, or simply roll it into a ball, tucking the edges underneath at the end.
Place rolls on a baking sheet covered by parchment paper or a silpat. Cover with the towel again and let rise for a good 30-45 minutes. While the dough is rising, preheat your oven to 375 degrees.
Melt your butter and use a pastry brush to brush the tops of your homemade dinner rolls with it, making sure not to crush any rising of the dough.
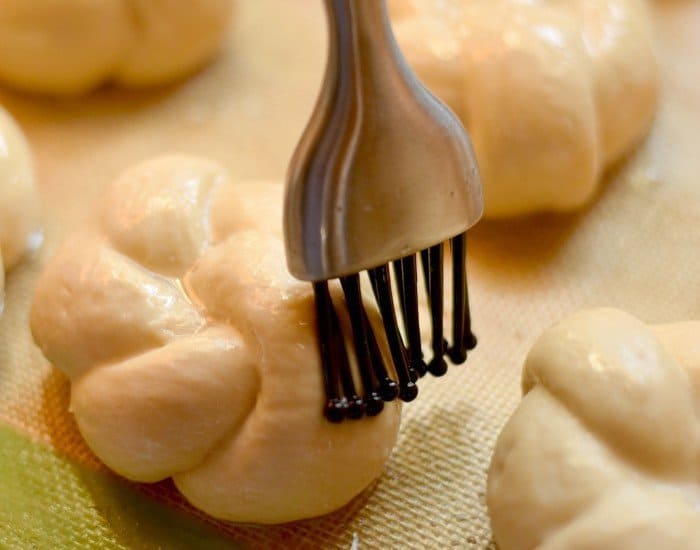
Bake the rolls for 16-18 minutes, until they’re golden brown on top. Remove from the baking sheet immediately and let cool on wire racks.

Serve immediately, or store in a tightly sealed container on your counter for 1-2 days.
You can also bake these ahead and freeze for up to a month. Simply reheat in a loose tin foil tent at 275 degrees for 20-25 minutes then serve immediately so they don’t dry out.
How to Shape Homemade Dinner Rolls into Knots
Even if you don’t use this recipe for your dough, you can still form knots. Divide the dough into however many rolls you plan to make.
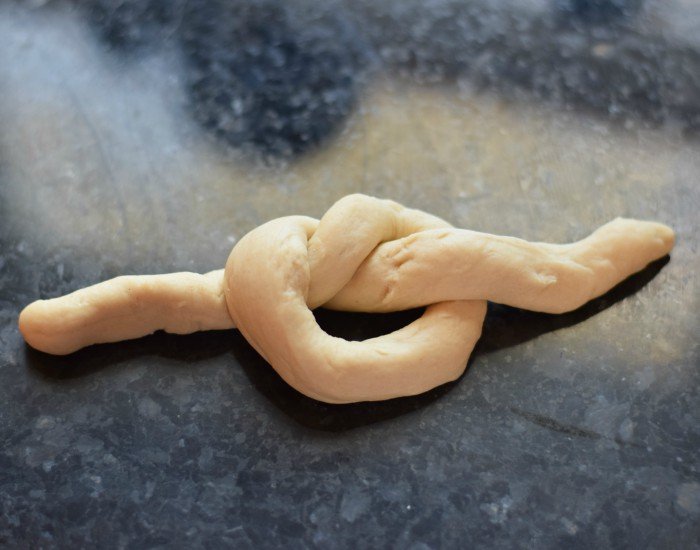
Start by rolling your dough into a snake (just like kindergarten!) about a foot long. Go ahead, get out your measuring tape if you need to.
Unlike other dough shaping, you do not want to add any flour to the process. As long as you don’t let the dough sit for an extended period, it won’t stick where it shouldn’t.

Gently tie the snake into a loose knot.
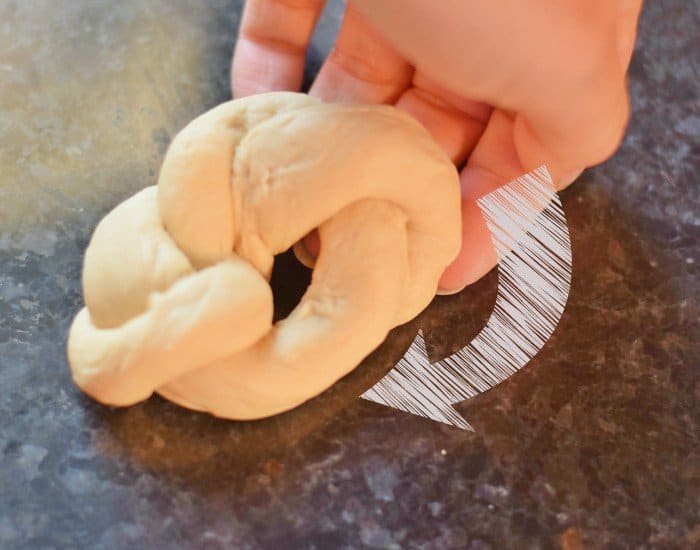
Tuck the bottom trailing end up and around the knot and tuck it into the center.

Take the remaining trailing end and pull it around to tuck under the knot, and close up the circle in the center of the knot.
Gently tuck all ends in and softly shape into more of a circle. Place onto a baking pan covered in a silpat or parchment paper.
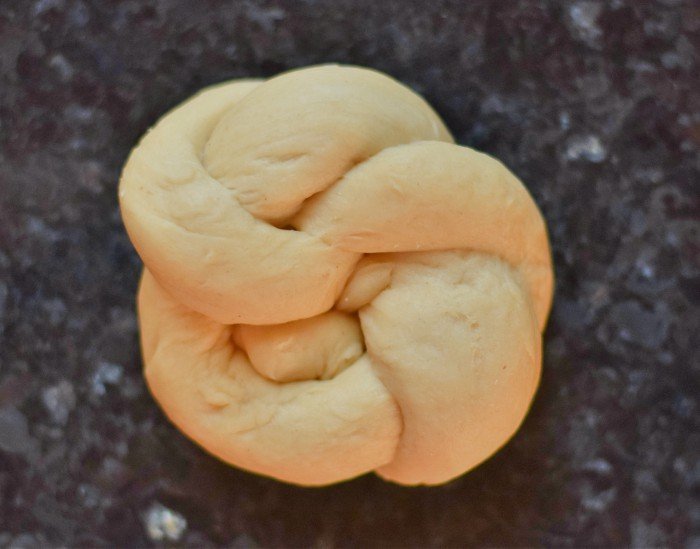
Repeat for all remaining dough chunks. See? Totally easy. The best part is that this is dough, so if you mess up, simply roll it out and try again.
Have you ever made homemade dinner rolls?
Perfect Pillowy Soft Dinner Roll Knots
Ingredients
- 1/2 cup warm water
- 1 tablespoon yeast
- 2 tablespoons sugar
- 1/2 cup warm milk
- 1 egg
- 2 tablespoons vegetable oil
- 1 teaspoon salt
- 3 cups flour
- 1 tablespoon unsalted butter
Instructions
- Add your warm water and yeast to bowl. Sprinkle in the sugar. In a separate bowl, whisk together warm milk, egg, oil, and salt. Pour into the water and yeast and stir.1/2 cup warm water, 1 tablespoon yeast, 2 tablespoons sugar, 1/2 cup warm milk, 1 egg, 2 tablespoons vegetable oil, 1 teaspoon salt
- Add flour, a cup at a time, and mix until it's formed a dough.Knead on low speed for 8-10 minutes. When it springs back, it's ready. It will still be slightly sticky.3 cups flour
- Cover bowl with a damp towel to hold in the moisture, and set it in a warm place to rise for an hour until it doubles in size.
- Divide dough into 12 equal pieces. Shape into rounds or roll into a snake and create knots for a prettier display.
- Place rolls on a baking sheet covered by parchment paper or sil pat. Cover with the towel again and let rise for a good 30-45 minutes. While the dough is rising, preheat your oven to 375 degrees.
- Melt butter and gently brush the top of each roll.1 tablespoon unsalted butter
- Bake rolls at 375 degrees for 16-18 minutes, until they're golden brown on top. Remove from the baking sheet immediately and let cool on racks.
- Serve immediately, or store in a tightly sealed container on your counter for 1-2 days.
Video


Notes
- You can also bake these ahead and freeze for up to a month. Simply reheat in a loose tin foil tent at 275 degrees for 20-25 minutes then serve immediately so they don’t dry out.
- For more tips and tricks, be sure to read the full article above.
Nutrition
This site uses an online source to provide nutrition estimates as a courtesy. If you need exact values, please calculate yourself.

I am a participant in the Amazon Services LLC Associates Program, an affiliate advertising program designed to provide a means for sites to earn advertising fees by advertising and linking to Amazon.com.
These were perfect!!! Im sharing the recipe with everyone!
Thank you! That’s so kind of you to say. We love the recipe here, too.
Thank you for the recipe. They were perfect!
Fantastic! I’m so glad you enjoyed them. A friend of mine made them and sent me a texted photo of them at almost the same time you posted this. I love hearing that people enjoy my recipes 🙂
Can I use quick rising yeast for this recipe?
I would not use quick rising yeast for this. It works differently than regular yeast, and the recipe isn’t written for this type. You want to use active dry yeast. Rapid rise yeast gives only a single rise, not the double rise you need for this. You could *possibly* try it and let the dough rest for 5-10 minutes then shape them and let it rise the rest of the way so it’s more like a single rise, but I cannot guarantee that would work.
(More info on yeast and everything you ever wanted to know – https://honestandtruly.com/baking-with-yeast-guide/ )