This post sharing how to make a duct tape pouch was originally a sponsored post.

Click here to pin this tutorial on how to make a duct tape pouch.
I’m at a point in my life where my friends and I no longer talk about the coolest places we’ve been lately or the things we did last weekend. Or at least… we don’t talk about them in the same way.
Often we’re talking about the bothersome things happening to us as we get older – because we have no shame anymore and there’s no reason to hide things away in the closet anymore. Or we commiserate over the silly things our kids did or the latest “disaster” in our lives. And we laugh. A lot.
Often, we’re doing this while out for a power walk in the park -since that’s what busy moms do, right? Socialize and exercise at the same time?
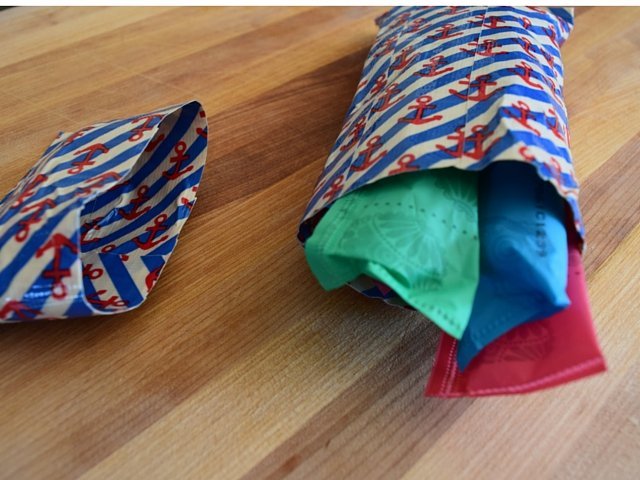
A chat about the need for discretely carrying certain female items led to the brainstorm to create this duct tape pouch. It slides open and closed easily and can hold everything from tampons to lipstick and more.
Personally, I lose so many things in my purse all the time, and other times packaging accidentally opens and I have to throw stuff away. I figured a duct tape pouch would solve both of these problems.
How to Make a Duct Tape Pouch (with Lid)
Creating a duct tape pouch isn’t difficult, and it takes less than ten minutes start to finish. I made mine with a fun pattern duct tape I have, but you could make the inside one color and the outside another or create all sorts of fun patterns with various colors of duct tape. I’m a simple girl, and I think these turned out pretty cool.
I made these in a couple different sizes. I love the size that is five strips across for larger items – almost using it like a travel makeup bag, but after experimenting, making a duct tape pouch three wide was perfect for my needs.
To start, all you need is duct tape (in one or more colors), a ruler, and scissors. The ruler is technically optional, but I like to try to not waste tape so like to use it.

When you’re thinking about how to make a duct tape pouch, figure out the size to start. For this, I cut three strips of duct tape that were eight inches long each.

Once I had them cut, I laid them each out next to each other and taped them together to make an eight inch long rectangle, being sure to give a little overlap over each section of duct tape.

I then rolled that with the sticky side out to make a tube. Give it just a bit of overlap on the duct tape to hold it together.

Next up is cutting another three sections of duct tape nine inches long. These will make the outside of the pouch and you need excess duct tape to make a seal at the bottom of your pouch.
See? Learning how to make a duct tape pouch isn’t that hard, is it?

Lay the first section onto your sticky tube of duct tape with one long end lined up with what will be the top of your pouch and the other hanging over that. Press down gently to get the two sticky layers to adhere to each other.

Lay the next nine inch segment sticky side up, and place the tube onto it. Line up the top edge with the top of your pouch, overhanging the first duct tape layer just a bit.
Roll the tube so that the duct tape attaches to your tube. Repeat for the third piece of duct tape so that it is completely covered all around.

Use your fingers to smooth the bottom overhang of duct tape so that they stick together. You want to create a seal for the bottom of your duct tape pouch.

The seal doesn’t need to be an inch long, so pick up your scissors and trim it off, leaving about an eighth of an inch of seal in place. You can easily feel where there is a double layer of duct tape versus just one layer and know where to snip.

Take a small section of tape the width of your tube or a little longer and place half of it over the bottom of your tube. Curl it over the bottom to create more protection for your bottom seal.
Trim the excess from the sides, and you’re finished with the main portion of the project. Nothing is falling out of this pouch!

Next up is creating the lid for your pouch so that nothing falls out accidentally – and it’s more discreet because no one can see in! For this, you will use the main portion of your pouch that you just created as a guide.
Tear off a section of tape a little longer than the circumference of your pouch – no need to be exact. Wrap it gently around your pouch near the top of it so that it is loose but not gappy.

Do the same with a second layer of duct tape, layering it about halfway down the first inside out piece of duct tape, then slide your new roll off the pouch base.

Use two more pieces of duct tape to cover the second tube, again lining up one layer with the “top” so that there is one end with excess duct tape you can use to make a seal the same way you did for the main portion of the pouch. I laid my duct tape out horizontally for this piece because it was more fun to have my pattern going in different directions, but line it up the way you want it to look.

Finish off the top seal in the same manner you did the bottom seal. Press it together, snip off the excess, and add a corner tape to ensure the seal never comes loose.
I also cleaned up both my top and bottom pouches. Just trim the open ends of the pouches with scissors to ensure they are even. This way, you don’t run the risk of them sticking closed.
Think you’re ready to learn how to make a duct tape pouch? If you’ve a visual learner, I also made a video tutorial sharing how I created these. Check it out below to see exactly what I did in each step.
Like this?
Subscribe to my blog so you don’t miss any posts
Follow on Twitter
Subscribe on Instagram
Follow on Facebook
Subscribe on Pinterest
What will you store in your duct tape pouch?

Making a pouch is such a smart idea! Love the duct tape you used!
Very impressive! I knew duct tape was sturdy but never thought of it as a storage case to carry things in my purse. I love it!
Such a cute idea. Very creative! And there are so many possibilities with all the options of duct tape.
Nifty Idea !