Mister Man turns 10 today. We’re lucky (in my opinion) that we live in an area where our school lets us not just still bring in birthday treats but homemade birthday treats. I’m totally ok with them, as we don’t do desserts or treats super often as it is, so the 25 times a year he has a cupcake or doughnut at school, I’m not going to complain. I try to do something fun each year, and this year I decided to make Minecraft cake squares.
I don’t usually go “fancy” for the treats I bring into school, but this year we are in the process of moving, so I don’t know when Mister Man will have his birthday party (though I know exactly what we’re going to do, and it’s so cool!). In an effort to make up for the parenting fail there, I decided to surprise him by making special birthday treats that he’d really get a kick out of.
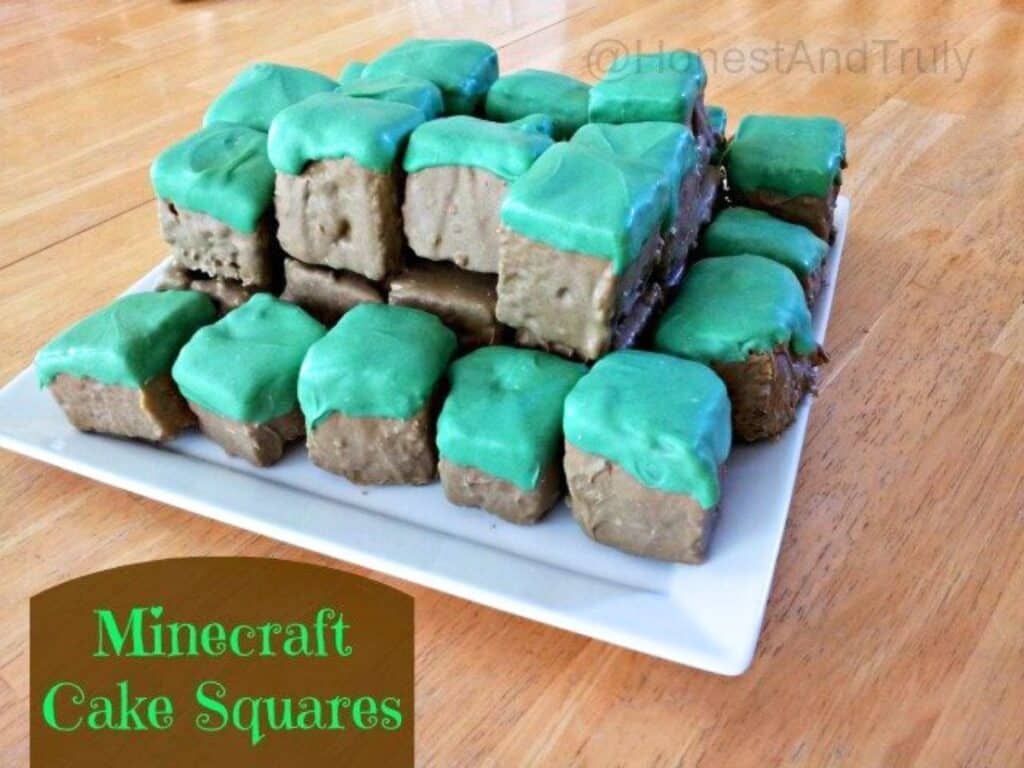
We’re a little into Minecraft around here, and I’m guessing we aren’t alone. Making the cake squares wasn’t difficult at all, but it was time-consuming because I had to create each individual piece. I think they turned out fairly well, and Mister Man was ecstatic, which is all that really matters. And of course, Little Miss asked that I make these for her birthday treat later this year. What have I gotten myself into?
But yes, he’s ten. I’m not quite sure how it happened, but ten years ago at 11:15 am, he was pulled from my stomach just before the Northwestern/Indiana kickoff of a game that went into double overtime, with Northwestern winning in the end. It was a somewhat rushed C-section, as he had his head turned up instead of down and was being bruised with each contraction. Another vivid memory of that day? The doctors all looking around in confusion as they asked if anyone noticed the time. I looked over and told them they opened me up at 11:11, pulled him out at 11:15, and I was sewn back up by 11:18. They were grateful to have that information for their records. I wrote all about his birth story a while ago, so I won’t share the whole thing again.
Enough waxing poetic. You can see how you can create the Minecraft cake squares.
Some links in this article are affiliate links that may earn me a commission if you purchase through them.
How to Make Minecraft Cake Squares
Bake a cake in a 9×13 pan. I made my favorite yellow cake, but you can make whatever flavor you want… even a box mix. Cook it as you normally would, and let it cool completely upside down on a rack. Place the entire rack into your freezer to freeze the cake, which will make it much easier to cut evenly for the squares.
Place your cake – still upside down on a cutting surface. I used my cake rack as a cutting guide to start so that I was cutting even slices. Use a sharp serrated knife, which will help cut through the frozen cake cleanly and easily.
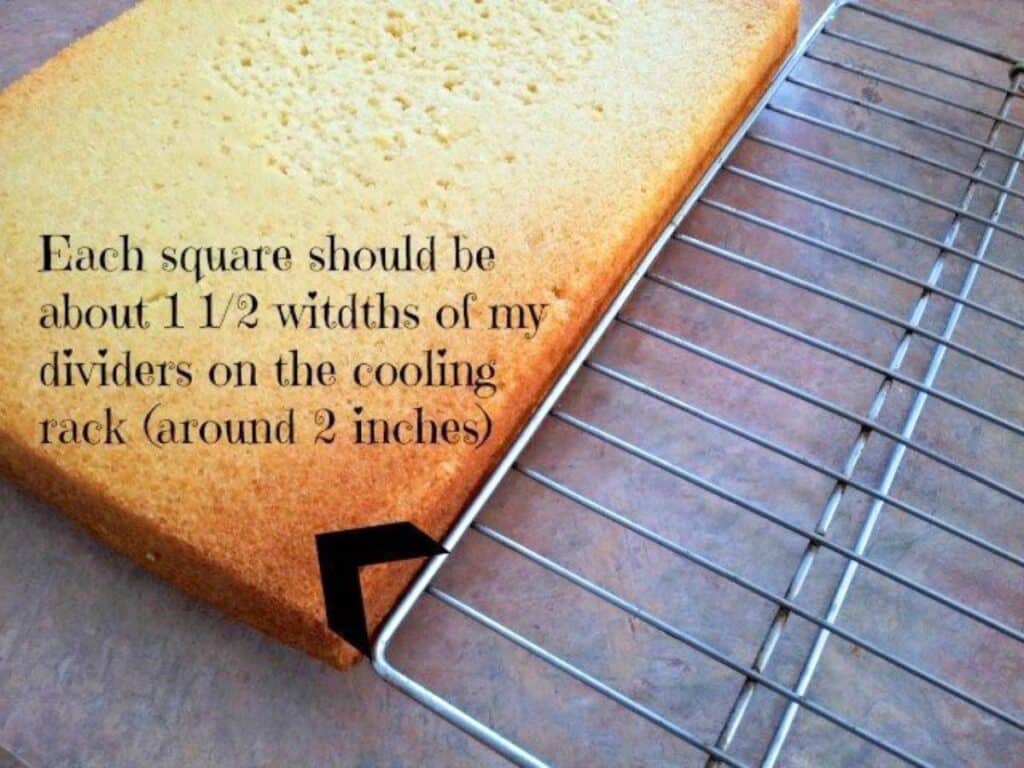
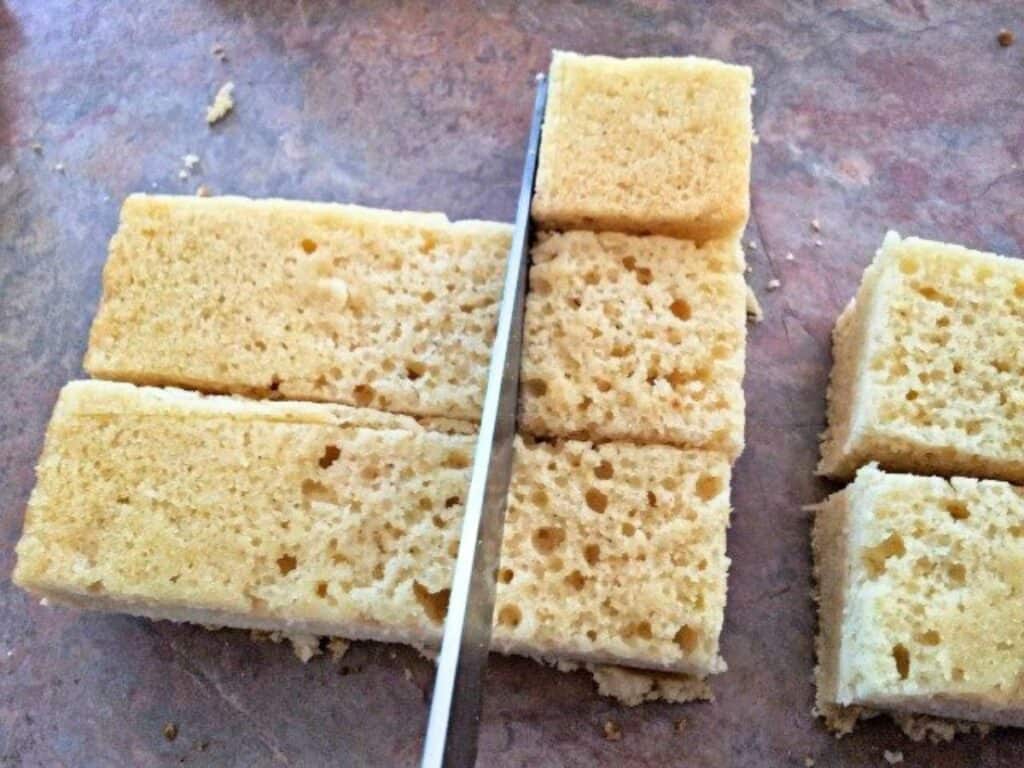
Once you’ve cut the short side, slice them two rows at a time (for speed without sacrificing accuracy by trying to do more at a time) into squares again using your cooling rack as a guide to start. Once you have a few pieces cut, use a piece as your guide for how wide the squares should be so they are all even.
I used the Wilton cake sealer product to spray the sides of my cake to prevent crumbs as I covered them in melted white chocolate. It helped, but if you don’t have any, it’s ok. Just make sure your cake is free from crumbs before you start and that your chocolate is warm enough that it’s thin enough to work with easily.

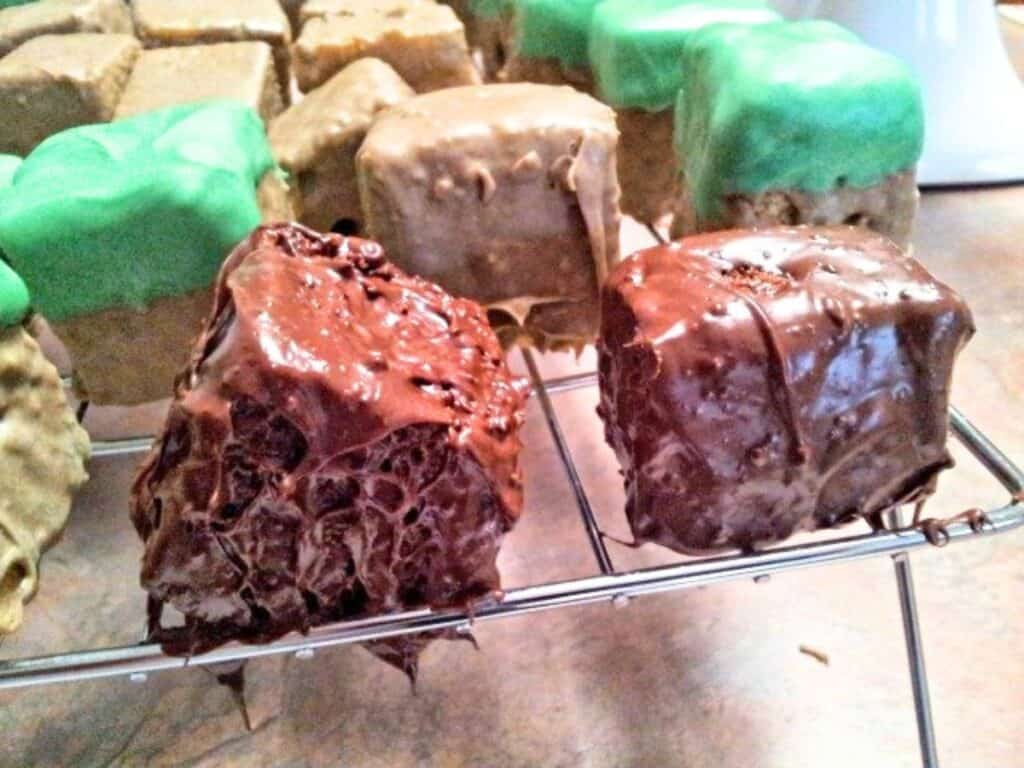
For the coating, I used melted chocolate for a few reasons. I wanted the kids to be able to pick up the cake pieces and eat them without a fork and without making a mess. I also wanted them to be smoother than frosting would be and to be easily coated on all sides like a real Minecraft brick. And since I’m making these cake squares a day in advance, I didn’t want the cake to get all hard and icky. The chocolate will seal the cake inside and keep it beautifully moist until you bite into it.
I also initially debated whether to use white chocolate or dark chocolate. I was planning to make the dirt squares from the game, some with grass tops and some without, and build them into a little scene, and I wanted to control the color of the brown more than I’d be able to with dark chocolate. The white chocolate tends to solidify after melting more nicely than dark chocolate (unless I add oil or other ingredients). The fact that I wanted to dye the squares green on top settled my decision – white chocolate is the way to go, although you could use dark chocolate if you choose.
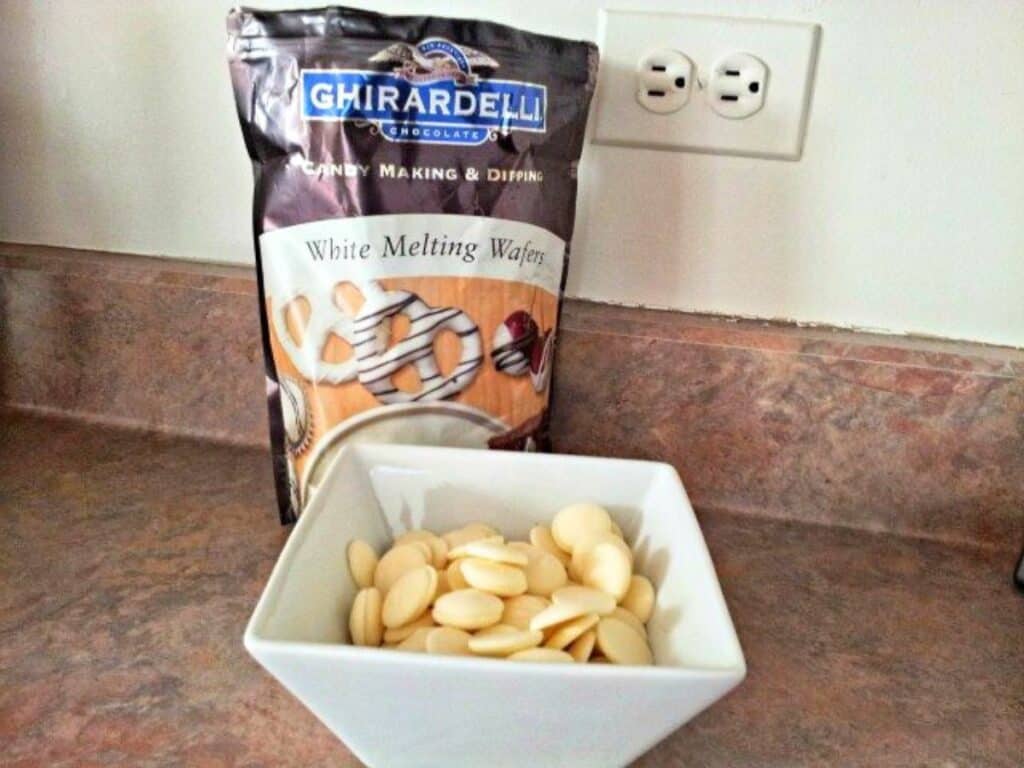
I did test out the colored white chocolate versus the dark chocolate, and I definitely like the white chocolate choice better.
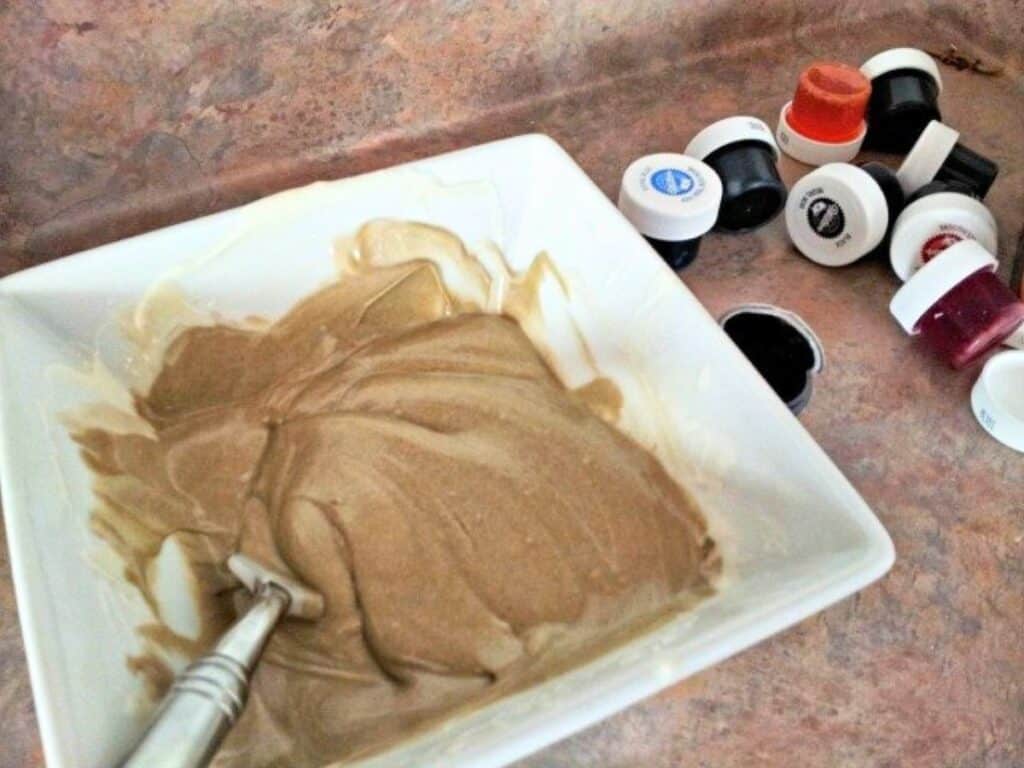
To coat the squares in chocolate, carefully melt your chocolate either over a double boiler or in the microwave, about 2 cups per batch. Keep stirring and remove from the heat (or microwave) before the chocolate is all melted to ensure it doesn’t burn. Add the coloring to the level that you want for the dirt brown and stir to ensure the chocolate is still thin and warm.
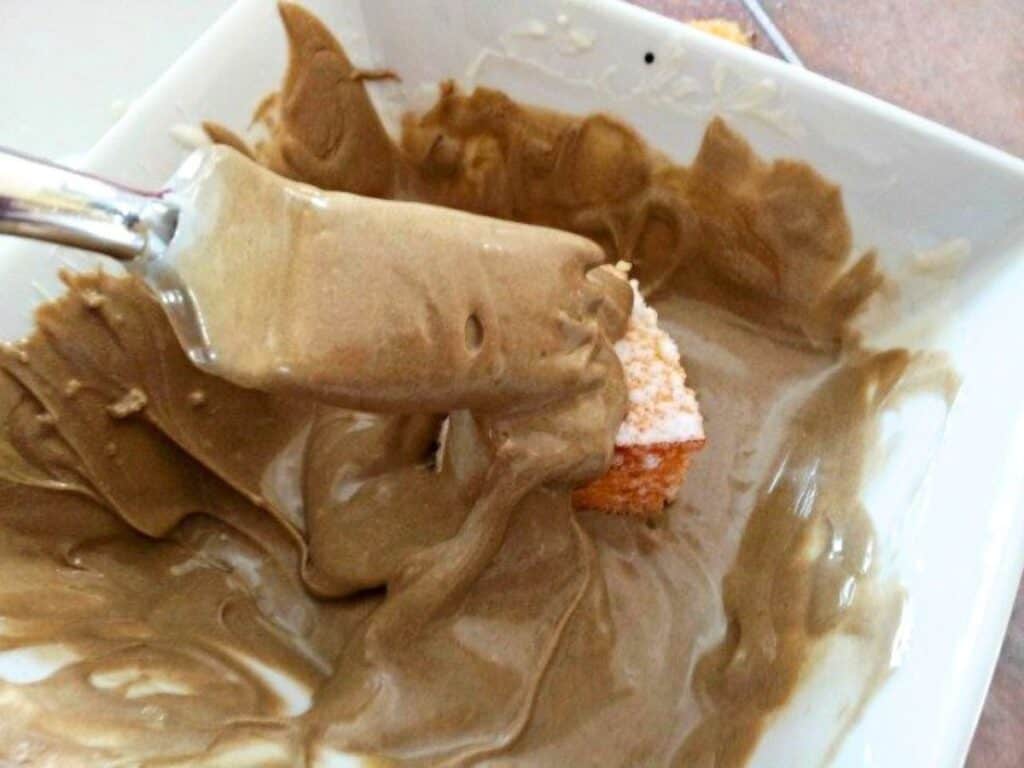
Using a fork, dip the cake square into the chocolate and turn to coat completely or spoon chocolate atop it to cover.
Carefully lift the cake square with the fork and tap it on the edge of the bowl until all excess chocolate is off the cake square and back into your bowl.
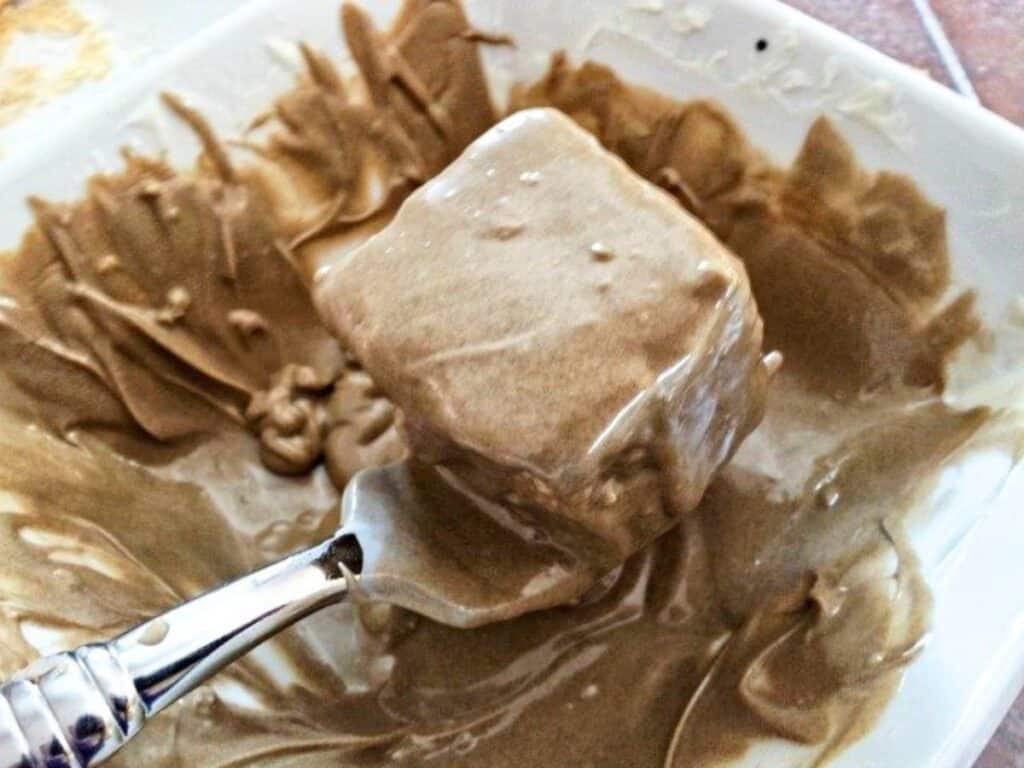
Still using your fork, carefully place the cake square onto the cooling rack and pull down with the tines to release the fork below the cooling rack rather than setting it on there and trying to pull the fork out or dumping it sideways onto the rack.

If your chocolate starts to thicken, reheat it just a little until it regains its smooth texture and consistency. As you run low on chocolate, melt more and add it to your bowl, again coloring it.
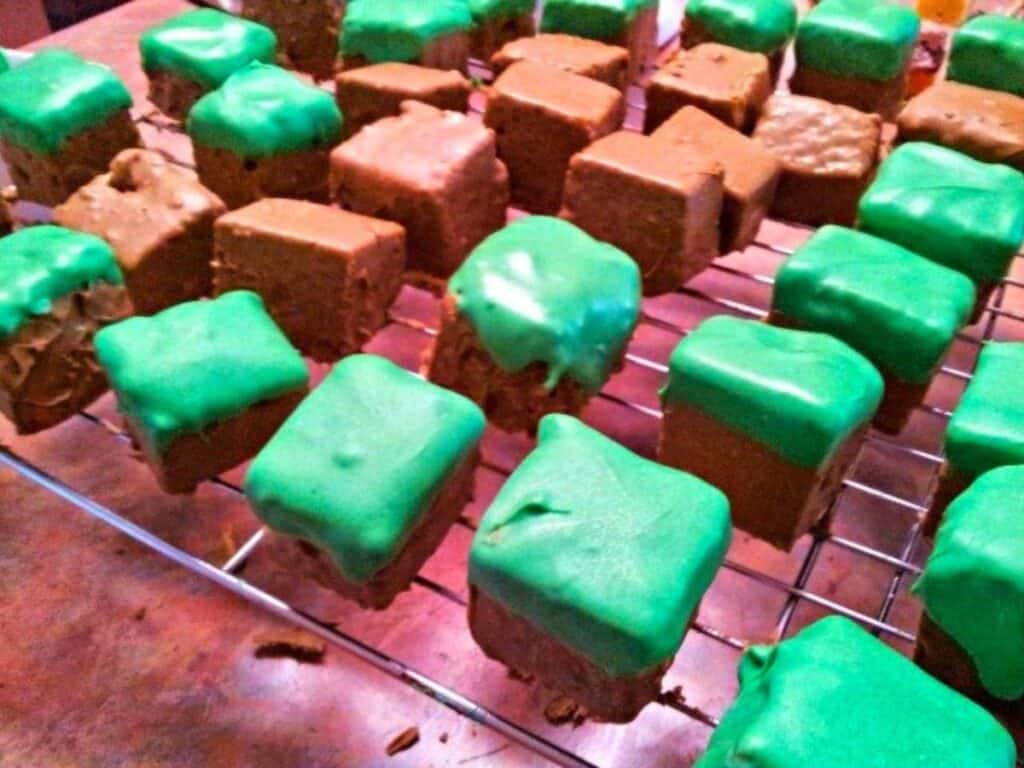
Once you’ve completed all the dirt squares, melt more white chocolate, place it in a new bowl, and color it grass green. Pushing from under the cooling rack to carefully release any cake square that may be stuck to the rack, pick up a cake square, and dip it into the green-colored chocolate. Swirl it just a touch so that the chocolate comes down the side just a little instead of only on the top.
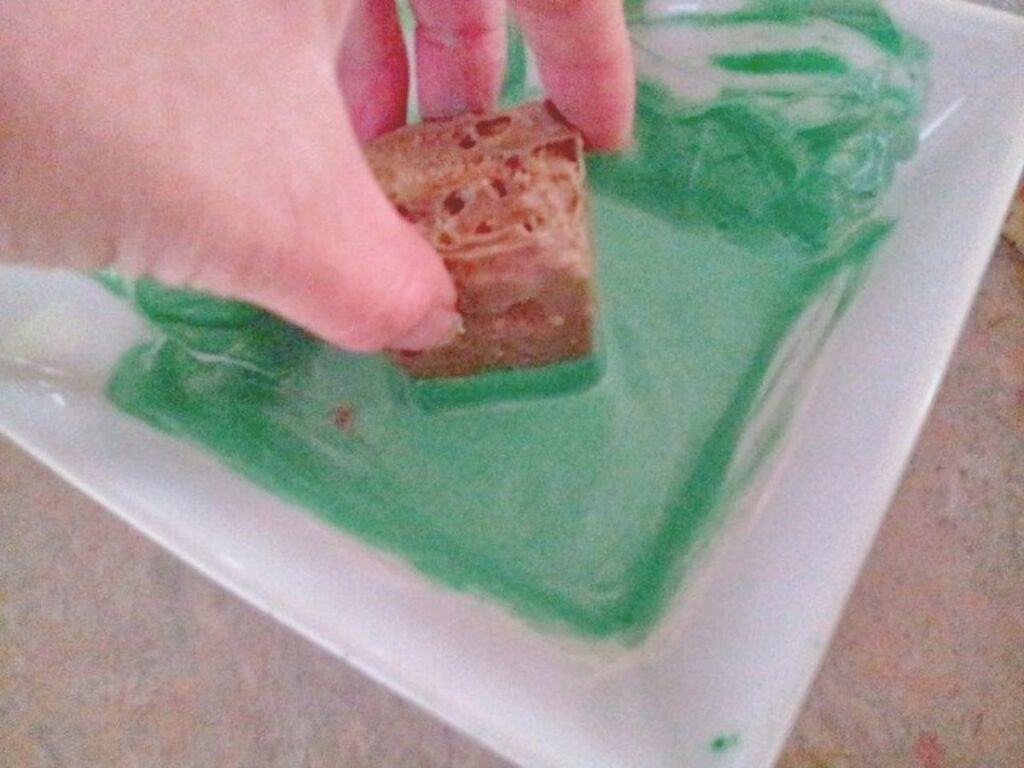
Lift and flip it in your hand so that the green is on top. It will not be even and may have a little line running through it. To get the top smooth, simply shake the cake square back and forth in your hands for a couple of seconds, then place the cake square back onto the cooling rack. Repeat with as many of the cake squares as you want to have grass tops and leave the remaining as dirt squares.

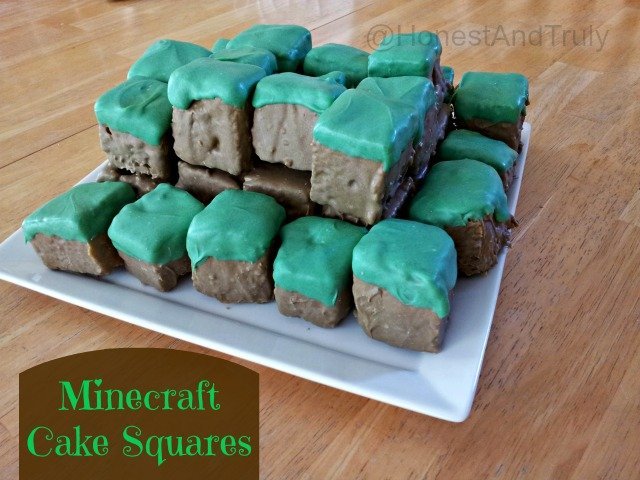
Once the chocolate has completely cooled and solidified, place the squares on a large plate and stack them up like a Minecraft field. Serve as is, and let the ooohs and ahhhs remind you that the effort was worth it!
Minecraft Cake Squares
Ingredients
- 1 9×13 cake baked and frozen
- 2 pounds white chocolate melting discs
- Food coloring
- Wilton cake sealer optional
Instructions
- Bake a cake in a 9×13 pan. You can make whatever flavor you wanT even a box mix. Cook it as you normally would, and let it cool completely upsidedown on a rack. Place the entire rack into your freezer to freeze the cake, which will make it much easier to cut evenly for the squares.
- Place your cake – still upsidedown on a cutting surface. Use your cake rack as a cutting guide to start so that it will be cut ineven slices. Use a sharp serrated knife, to cut through the frozen cake cleanly and easily.1 9×13 cake
- Once you’ve cut the short side, slice them two rows at a time into squares again using your cooling rack as a guide to start. Once you have a few pieces cut, use a piece as your guide for how wide the squares should be so they are all even.
- Use the Wilton cake seal product to spray the sides of the cake to prevent crumbs as you cover them in melted white chocolate.Wilton cake sealer
- To coat the squares in chocolate, carefully melt your chocolate either over a double boiler or in the microwave, about 2 cups per batch. Keep stirring and remove from the heat (or microwave) before the chocolate is all melted to ensure it doesn’t burn. Add the coloring to the level that you want for the dirt brown and stir to ensure the chocolate is still thin and warm.2 pounds white chocolate melting discs, Food coloring
- Using a fork, dip the cake square into the chocolate and turn to coat completely or spoon chocolate atop it to cover.
- Carefully lift the cake square with the fork and tap it on the edge of the bowl until all excess chocolate is off the cake square and back into your bowl.
- Still using your fork, carefully place the cake square onto the cooling rack and pull down with the tines to release the fork below the cooling rack.
- If your chocolate starts to thicken, reheat it just a little until it regains its smooth texture and consistency. As you run low on chocolate, melt more and add it to your bowl, again coloring it.
- Once you’ve completed all the dirt squares, melt more white chocolate, place it in a new bowl and color it grass green. Pushing from under the cooling rack to carefully release any cake square that may be stuck to the rack, pick up a cake square and dip it into the green colored chocolate. Swirl it just a touch so that the chocolate comes down the side just a little instead of only on the top.
- Lift and flip it in your hand so that the green is on top. To get the top smooth, simply shake the cake square back and forth in your hands for a couple seconds, then place the cake square back onto the cooling rack. Repeat with as many of the cake squares as your want to have grass tops and leave the remaining as dirt squares.
- Once the chocolate has completely cooled and solidified, place the squares on a large plate and stack them up like a Minecraft field. Serve and enjoy.


Notes
- If you don’t have any Wilton cake seal, that’s fine. Just make sure your cake is free from crumbs before you start and that your chocolate is warm enough that it’s thin enough to work with easily.
- You can use dark chocolate instead of white chocolate.
- For more tips and tricks, be sure to read the full article above.
Nutrition
This site uses an online source to provide nutrition estimates as a courtesy. If you need exact values, please calculate yourself.

I am a participant in the Amazon Services LLC Associates Program, an affiliate advertising program designed to provide a means for sites to earn advertising fees by advertising and linking to Amazon.com.
One Comment