I was invited to the test kitchen of ACH Foods, which is the parent company of Fleischmann’s to learn about yeast. I received a gift basket but was not compensated in any other way. All opinions remain my own.
Yeast can be a tricky little bugger. I bake with it frequently, but there is so much that I don’t know about it. I may use it frequently, but I know I could do better. The opportunity to learn from Nancy and Diane who work in the test kitchen and answer customer questions at Fleischmann’s was something I could not pass up.
I don’t buy bread, I make my own. I make homemade pizza with homemade crust all the time. And we love it. But I know there are improvements I could make. My baguettes are never the soft fluffy creations that I can buy in a good bakery. They taste good, and they aren’t tough, but that soft texture inside isn’t quite there.
I finally found out why. I put too much flour in my dough. I’m not alone, however. Diane went to a master baker class where they worked on bread – professional bakers, mind you – and everyone put in too much flour. Flour makes us feel good. It keeps things from being too sticky. It helps create a more workable dough. But it also means I end up with a loaf of bread that isn’t all it could be. My goal now is to be comfortable with a slightly more sticky dough.
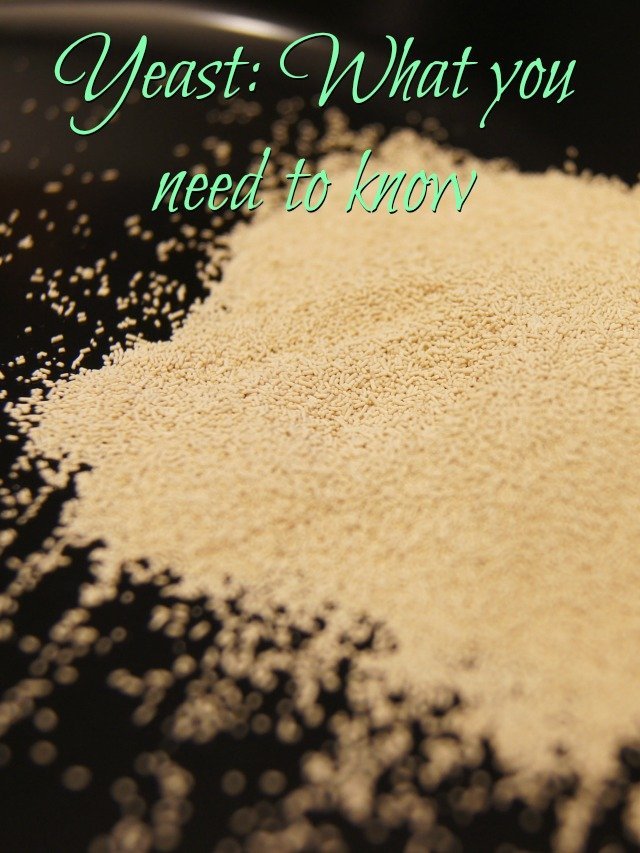
But I’m getting ahead of myself. Do you know about the differences in yeast? There are three different kinds of yeast that you can typically find in stores. Cake yeast, the fresh yeast that bakers have traditionally used, is not one that home chefs often use, and I’ll skip bread machine yeast for now, too, since we didn’t cover it in our day.

Active dry yeast is the yeast that we typically use in recipes. Each packet has 2 1/4 teaspoons of yeast, a standard measurement. I buy my yeast in a jar or – better yet – in a sealed two pound package, which gives me more flexibility in how much yeast I’ll use. Traditional yeast was only developed during World War 2, interestingly enough. Before then, yeast was completely fresh and lasted only 60 days. Our boys over there needed bread, and active dry yeast (the earlier yeast is wet) can last for two years before being opened. Once it’s been opened, however, you must use it within 6 months before it starts dying off and will impact your doughs.
Rapid Rise Yeast was only invented in the 1980s and came about in response to our busy lives and a desire to not have to wait so long for bread to rise. Because it doesn’t need to be rehydrated, it saves time in preparation – and you only need to have it rise one time instead of two rises like traditional yeast. The granules are smaller and finer than active dry yeast, but it’s otherwise fairly similar to active dry yeast. Interestingly, rapid rise yeast is designed to be mixed with your dry ingredients rather than being proofed like active dry yeast and fresh cake yeast.

The most recent entry to the family at Fleischmann’s is the pizza crust yeast. They created this because making pizza crusts is the most popular use of yeast in America – not a shock given how often I use my yeast for pizza dough, right? There are some dough tenderizers in the yeast, which means that it keeps the dough relaxed so that it doesn’t snap back when you’re rolling or pressing out your pizza crust. It means you can mix it, knead it and go. No rising, no resting. That means pizza is on the table in a half hour from start to finish, and I mean from scratch pizza. I’ve verified this at home, and I love it!
When using yeast – regardless of what kind – it is important to treat it right. It is a living organism, and it’s possible to kill it. How? The biggest factor (aside from age) is water that is too hot. Water that is too hot – over 130 or so degrees – will kill the yeast, and there’s no recovering from there. Diane and Nancy did an experiment for us showing how yeast rises at different water temperatures. Ice water does allow the yeast to activate, but slowly. Water at 110 degrees rises rapidly and well. And that hot water at 140 degrees? Well, that’s what dead yeast looks like. We came back a half hour later and actually had to dump out the “ideal temperature” water because it was about to overflow from the measuring cup!

If you aren’t sure about your yeast – and unless you bake it with all the time, that’s probably you – you want to proof it before you start. Take a half cup of your ideal temperature water at 100-110 degrees and add your yeast with just a little bit of sugar. Let it rest for five minutes. If you see no bubbles or reaction, toss it and get new yeast. If you’re seeing a reaction happening (your yeast bloomed!), proceed with your recipe. If you aren’t up for figuring out the exact temperature, you want it to be warm to the touch as our internal body temperature is just under 100 degrees, after all, but is still one you can handle running over your hand. Since I always keep my hot water heater just under 120 degrees (a good practice in general), I know my water is safe for yeast (since it takes water hotter than 120 degrees to kill yeast).
You want to mix it until it comes together in a ball, adding just enough flour until you can work with it. It will still be sticky for most doughs and probably wetter than you think it should be. While I usually use my stand mixer – because I’ll fully admit that I’m lazy – this is easily done in a bowl with a wooden spoon. Doesn’t Emily (who was also at this fun day with me!) look professional stirring her dough?

From there, start kneading. Use two hands on a lightly floured surface to push the dough away from you then fold it over and turn a quarter turn and repeat. Pull in the flour to your dough while kneading as you need it, just enough to keep it from sticking to your hands.
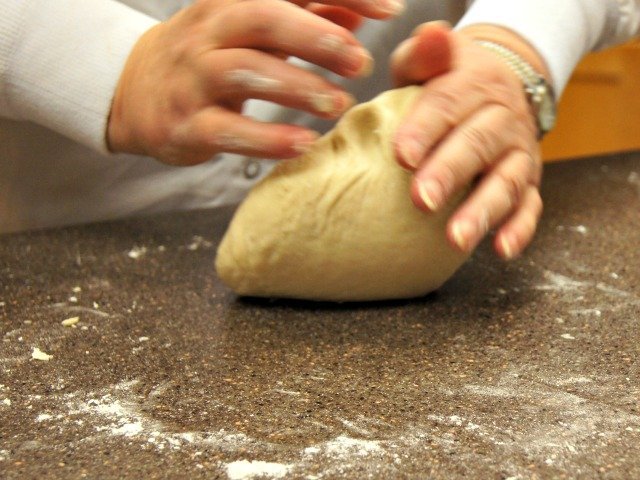
How do you know when to stop kneading? You’ve kneaded it enough when you can push the dough with your finger and it springs most of the way back to its original shape. So cool, no?
We made pizzas while at the event, partly because they can be done so quickly, especially with the pizza dough yeast I mentioned earlier. Though pizza is traditionally hand stretched and tossed, there are other acceptable methods for the home cook. Because I can see my dough either stuck to the ceiling or on the floor. Or both at the same time. I usually roll mine out with a rolling pin, but you can also stretch it a bit and then push it with your fingertips into the shape you desire, just being careful not to poke holes in the dough.
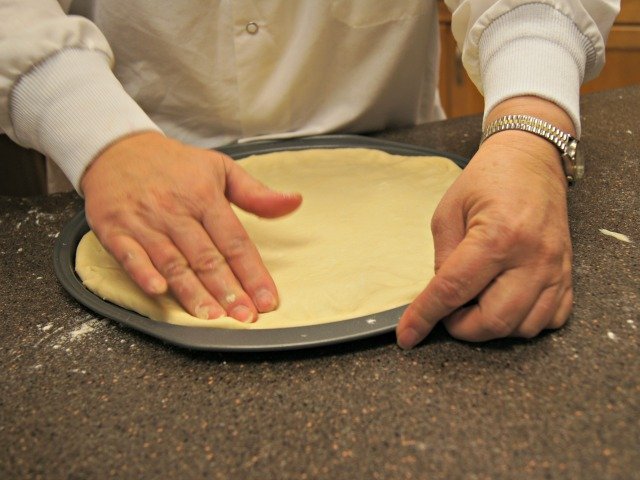
I’m lucky that I have a pizza stone at home, as it creates an amazing crust. If you don’t have one, you can use a pizza pan. The pans that have holes in the bottom help to form a crispier crust than those that don’t have holes, as Diane and Nancy explained. It’s the airflow going through that makes a difference. They also suggested not putting too many toppings on your pizza, as that will make it soggy, since it’s more difficult to cook the crust. They suggested cooking the crust a little first then adding toppings if you want to have more than three or so toppings. We made several different pizzas to try, and the fresh tomatoes and buffalo mozzarella really made for an amazing looking and tasting combination. We did well, no?
 We learned some other great tricks and tips while at the kitchens with Nancy and Diane, as well.
- When cooking with whole grains, don’t knead as much because the sharp edges of the whole grains will cut the gluten strands you’re creating by kneading, which means your bread won’t have the gorgeous structure and density you’re looking for. In fact, make sure you cut your whole grain flour with “regular” flour to help avoid this problem. Diane and Nancy recommend a 50/50 split at most for whole grains.
- Sugar, cinnamon, and salt will slow the rise of yeast. That isn’t a bad thing necessarily, but know what you have in your dough to anticipate your rise times. For example, a sweet dough with sugar will take longer than a traditional baguette with no sugar. Cinnamon rolls and cinnamon raisin bread always have the cinnamon rolled into them at the end, not mixed into the dough. I bet you know why, now!
- Dough will rise more slowly when it’s cold (which we know from the yeast experiment above), but the biggest challenge to rising doughs is actually drafts. Keep your dough away from any windows or vents.
- Another key to getting a good rise from your dough? Cover your dough with a damp towel or plastic wrap. You don’t want the top to dry out and form a crust. It won’t rise as well, and you’ll have a weird texture in your bread from the dried out dough.
- I have always added water to a pan preheated in my oven when I add breads that should get a crispy crust like a baguette. The steam that is created from the water is what forms the great crunchy texture on the outside. Another easier trick Diane and Nancy taught us? Simply toss in a few ice cubes – so much easier than my method.
So what’s your best trick to baking with yeast?
2 Comments